The Flight Deck Keyboard [Road to build my own keyboard part 13]
This is English version of 【完全自作キーボードへの道13】飛行甲板キーボード. Please be patient with my poor English… But I think loving mech-key is beyond language!
Now I barely understand how to make keyboard PCB using KiCad, and I know how to order it. Time to make my ideal keyboard, not an etude. It’s my first time to make practical keyboard from ground up, and I noticed variety of things such as layout, easiness of build.
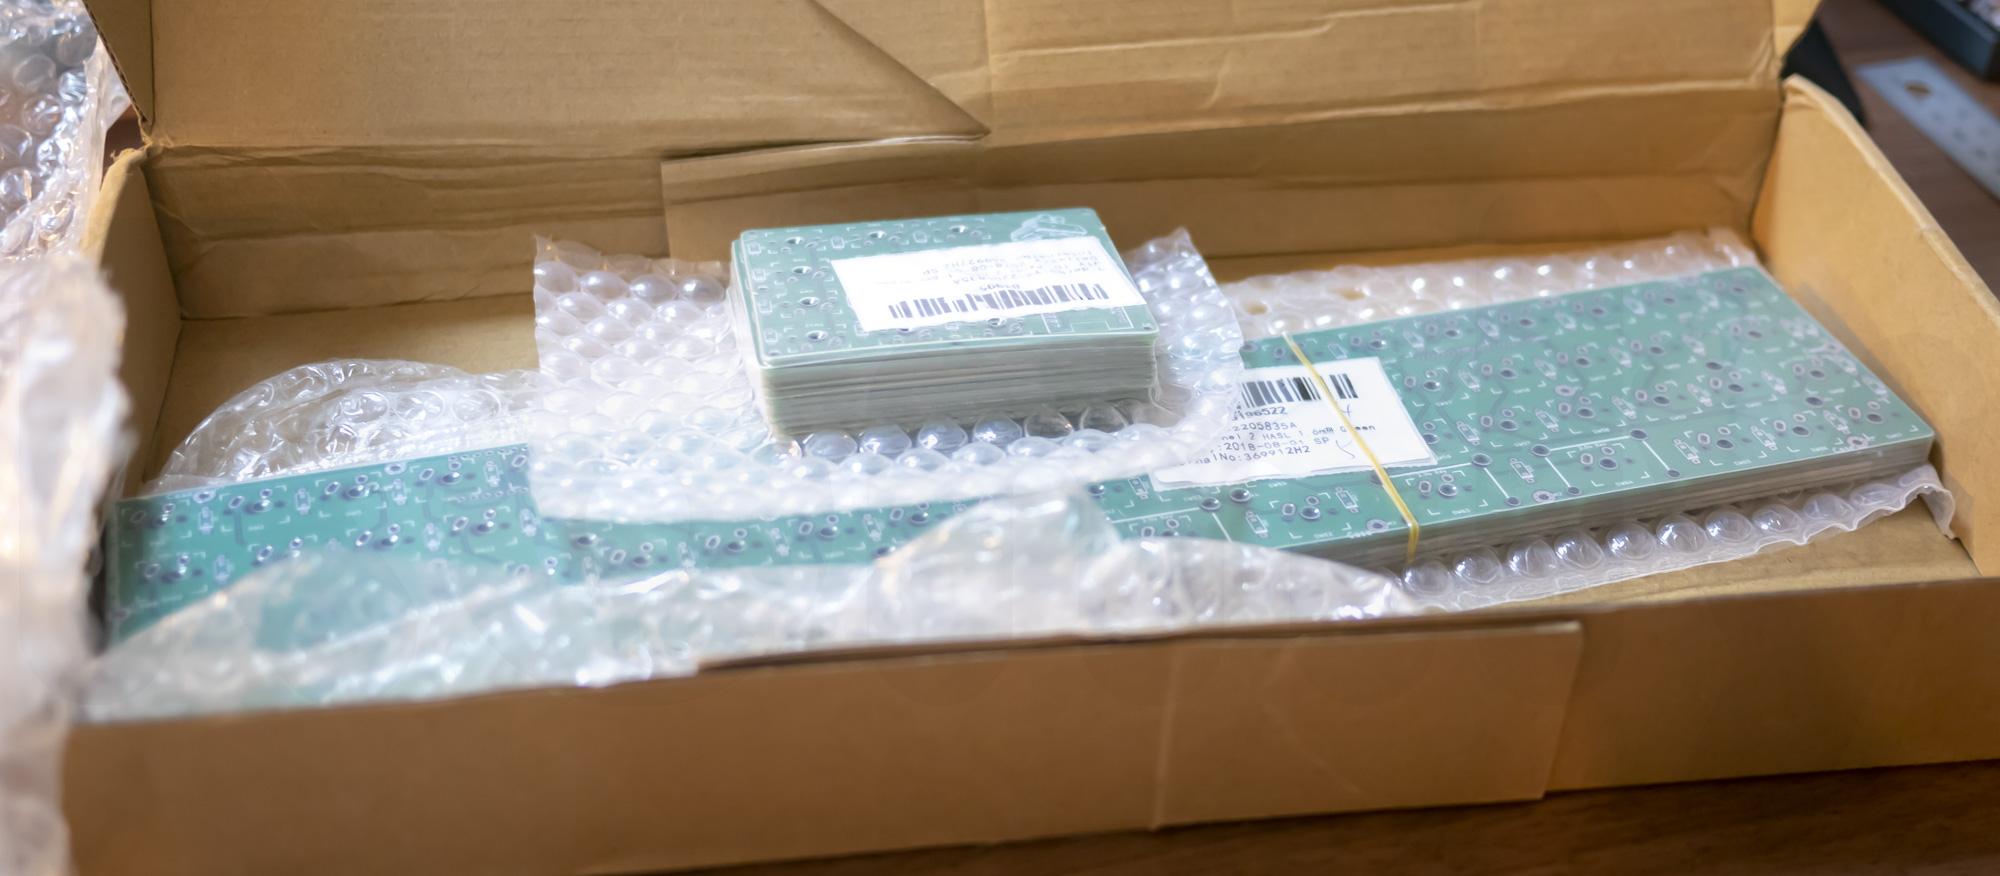
I accustomed to order a PCB already! But this PCB is huge. Super long shape. I guess even they didn’t have a box to fit, two boxes were combined.
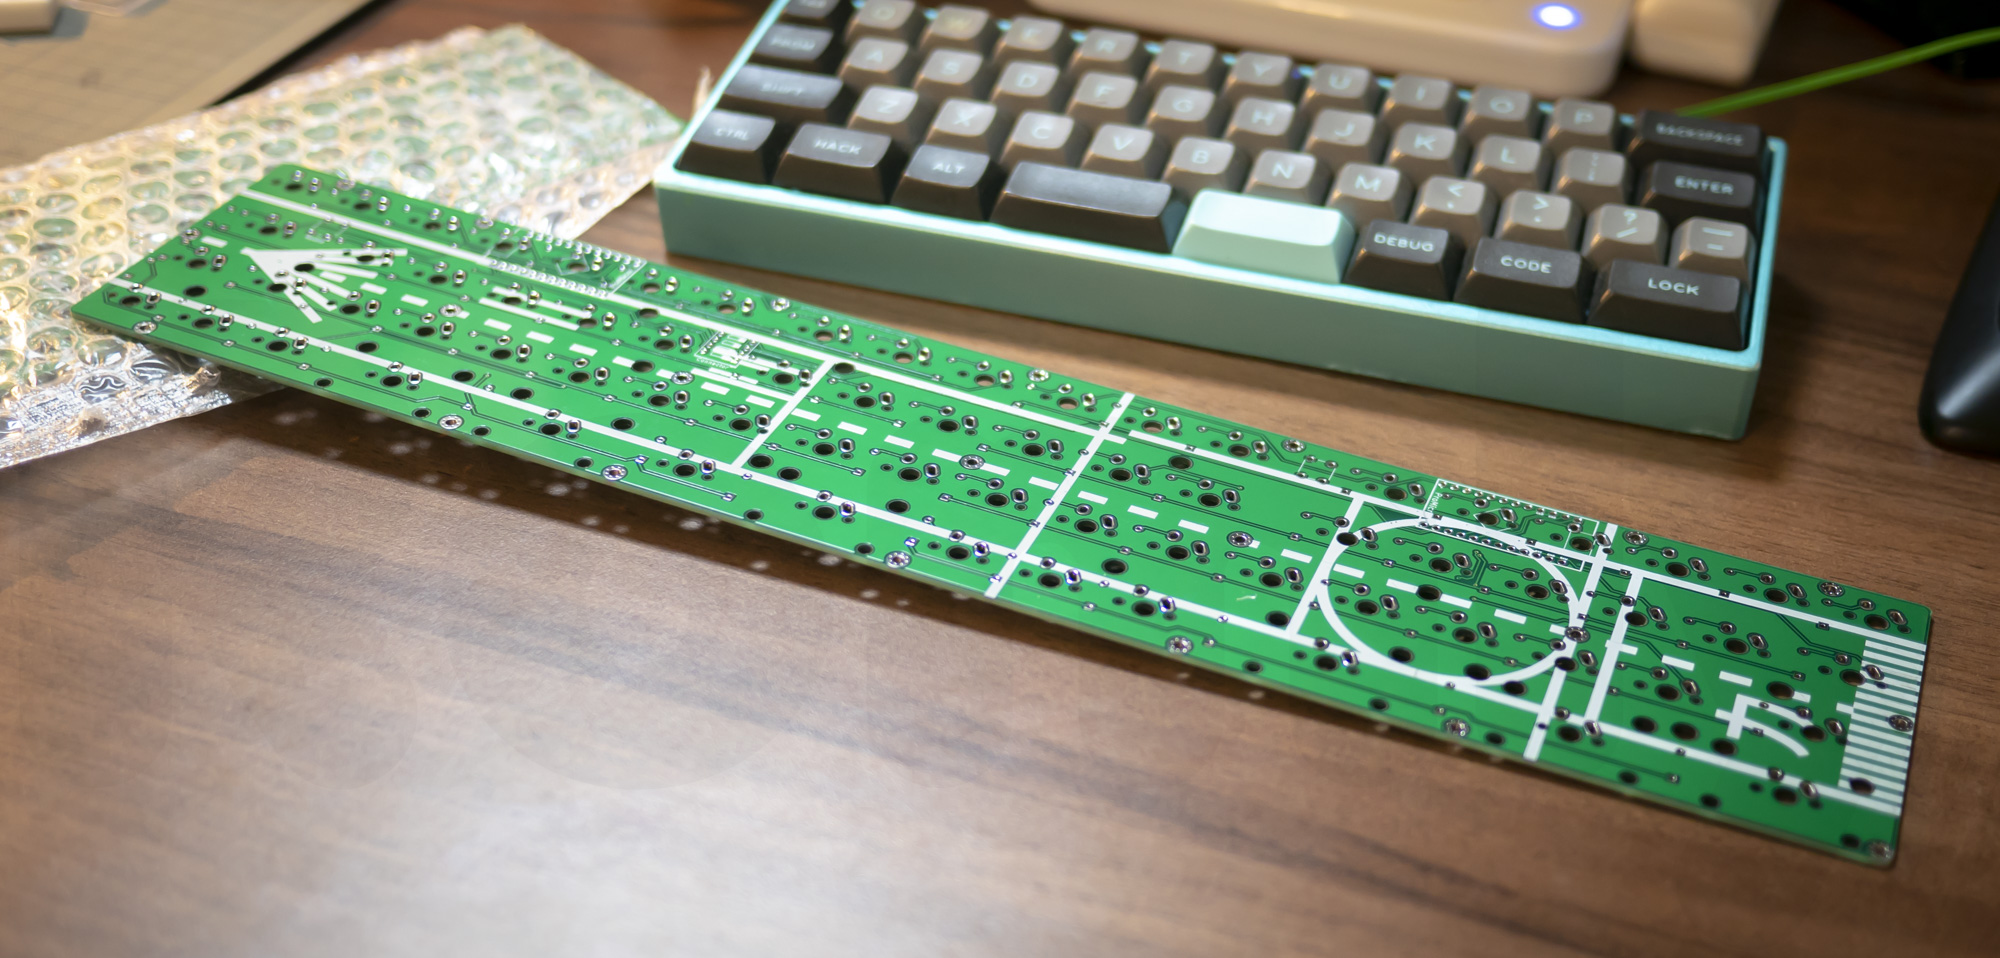
This is the PCB, “Flight Deck Keyboard“, I named it. Too narrow and long, so I printed aircraft carrier flight deck silk. And it fits perfectly, so the name it is.
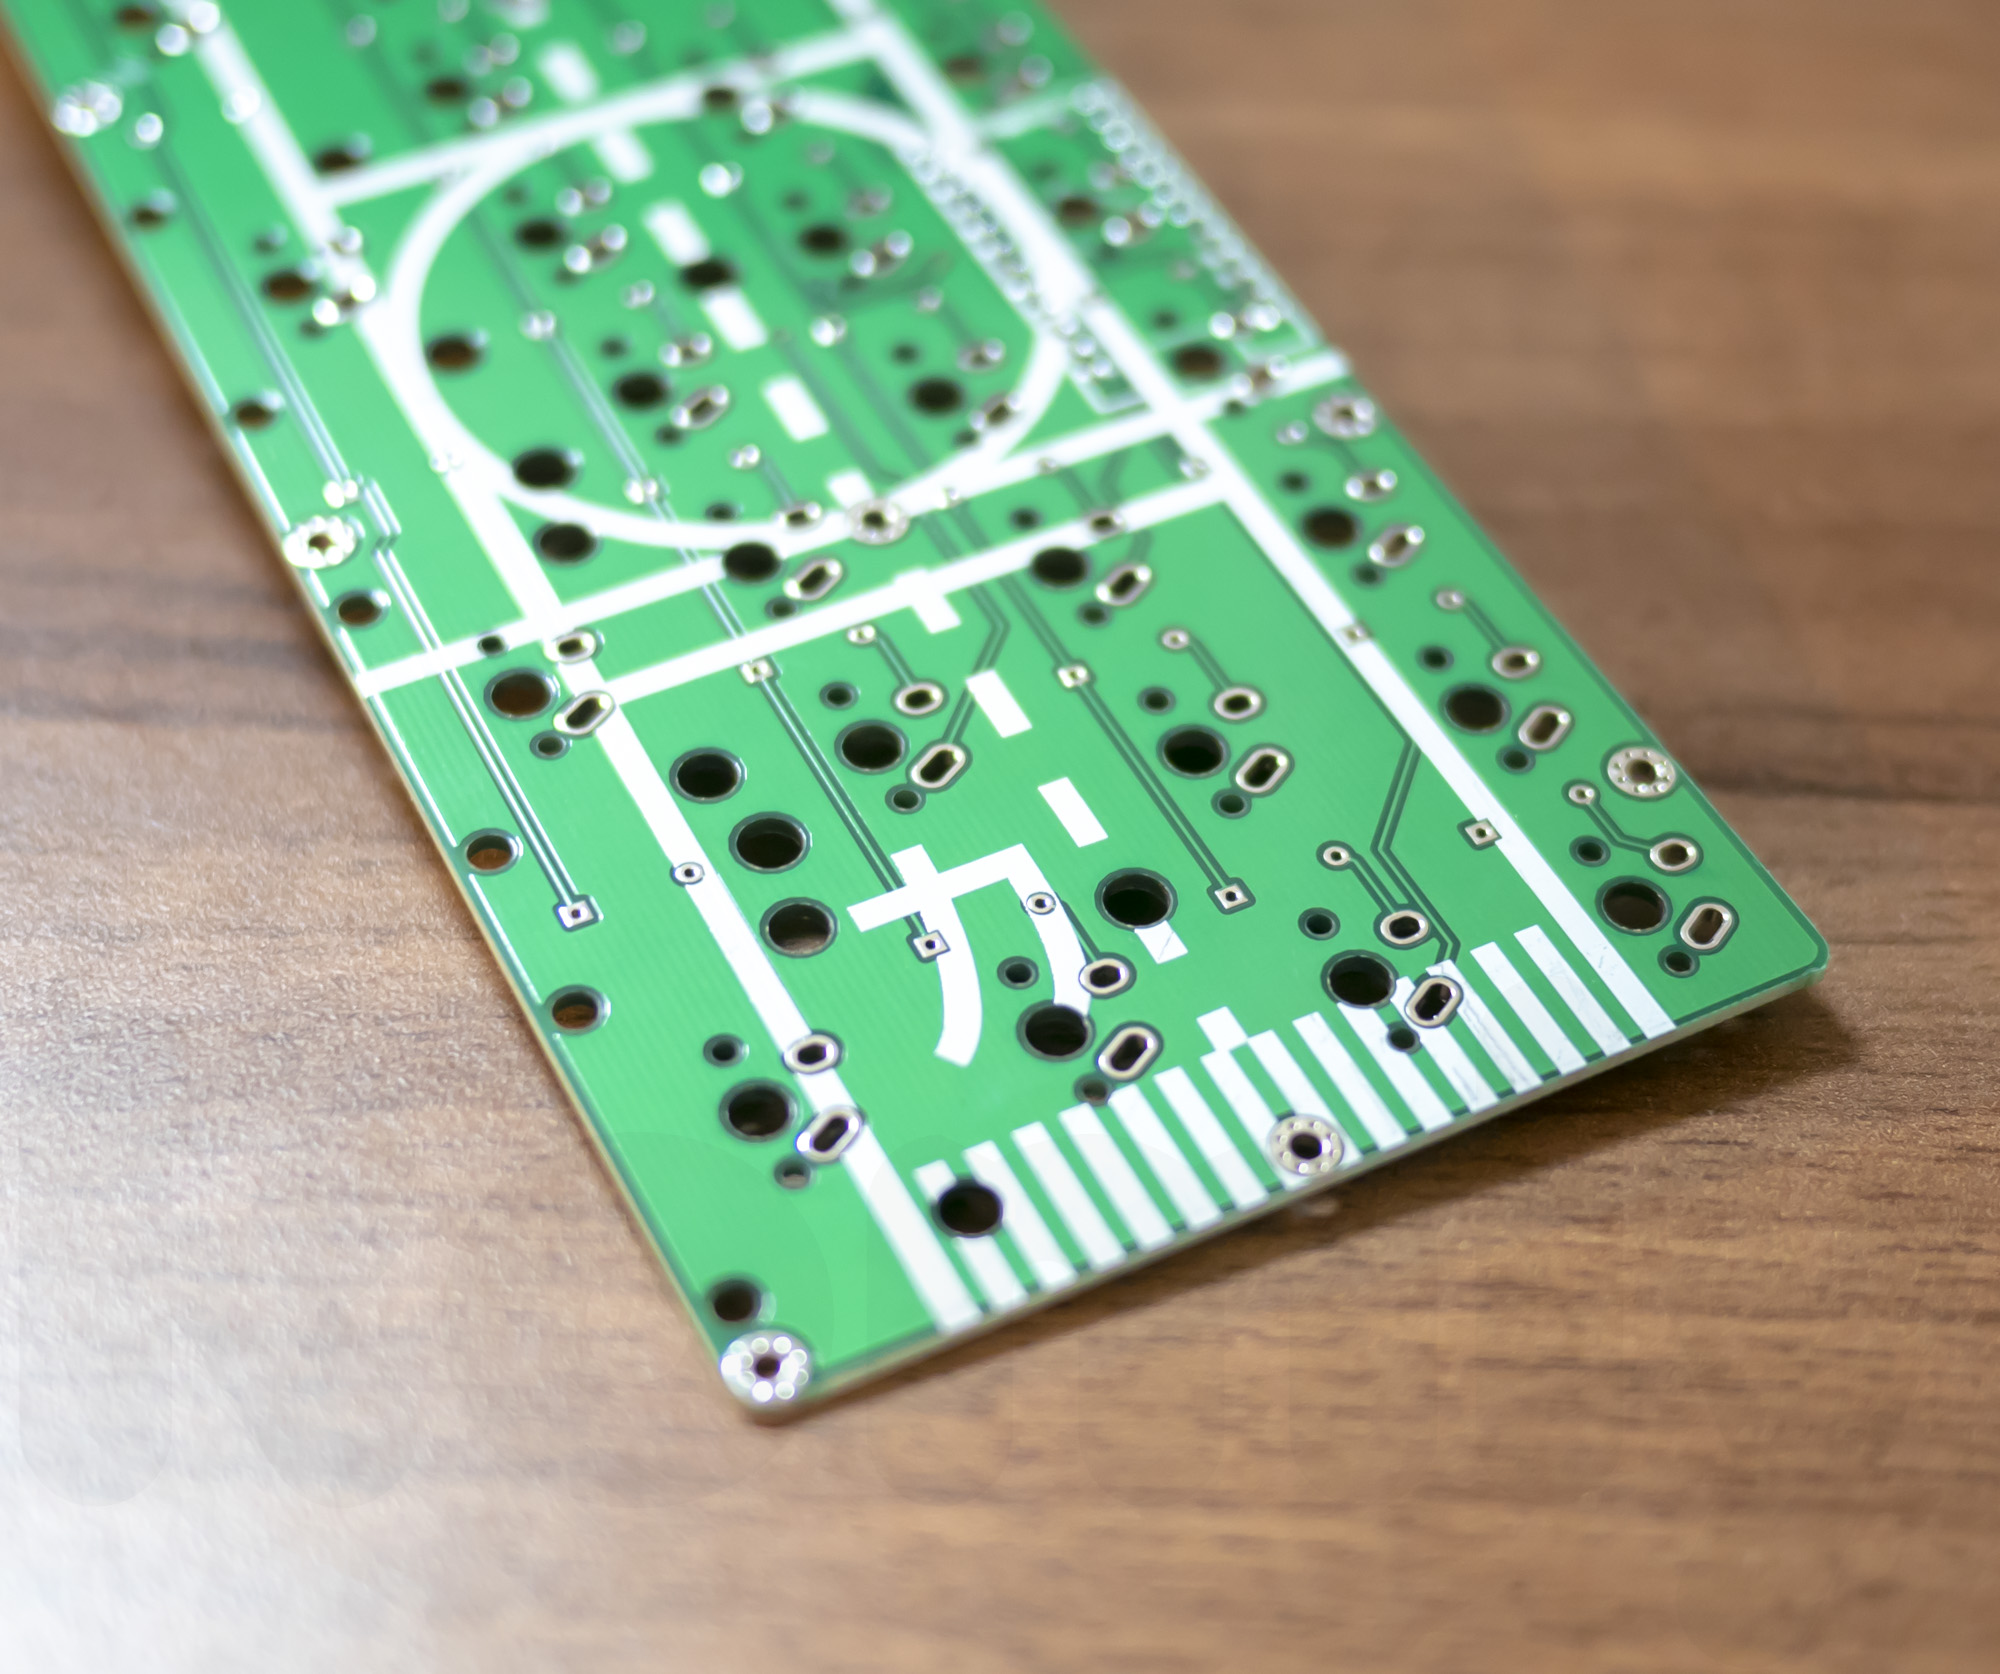
By the way the flight deck is from Imperial Japanese Navy’s aircraft carrier Kaga. I mean, Kaga-san of Kan-Musu. I drew it by using Illustrator, and converted to BMP which KiCad can handle. I flatter myself that it looks quite good.
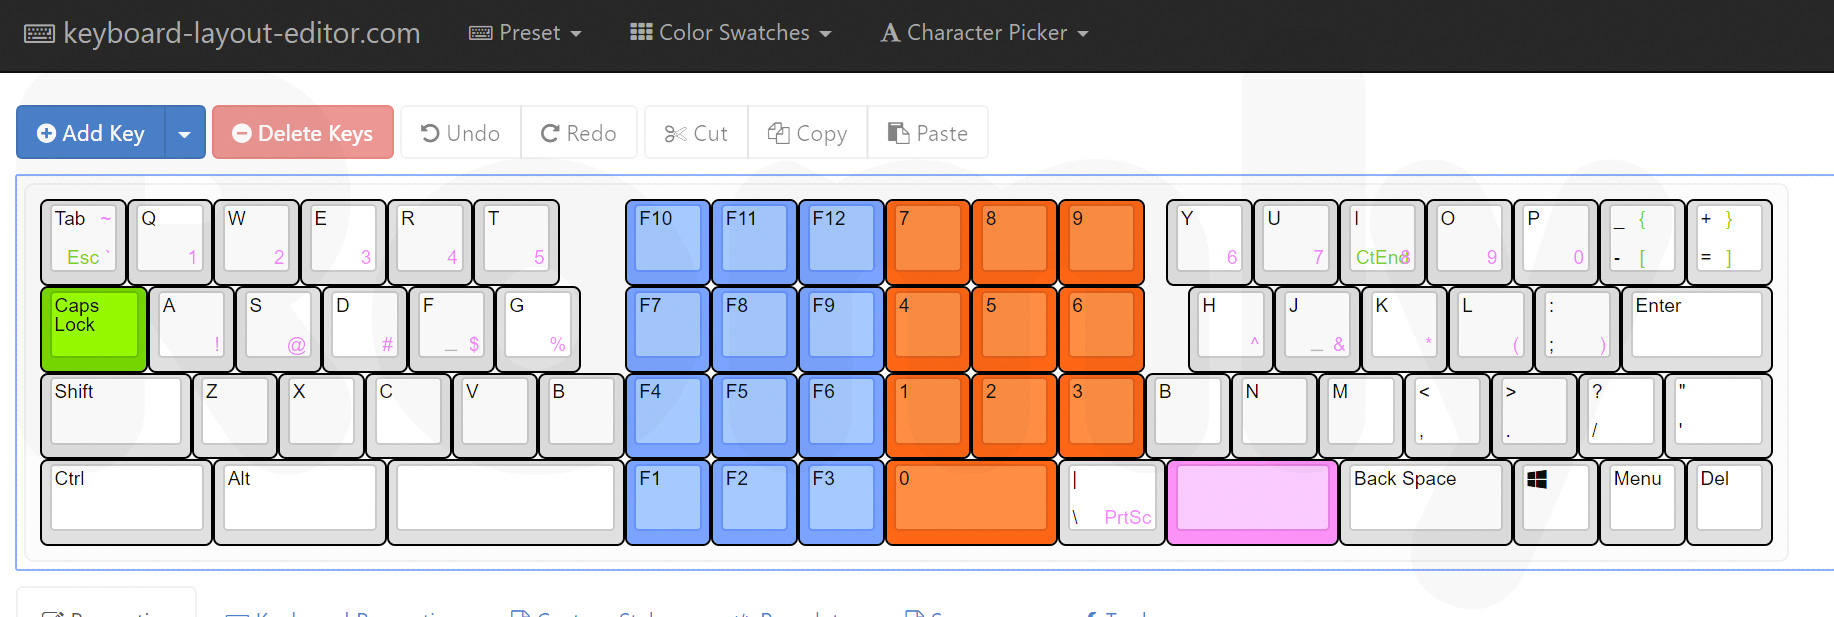
The layout is above. I separated MiniVan style 40% to left and right, and put Functions and Numpad on the middle. I’ve been using 40% quite long so I don’t have complaint about 40% normally, but I want Numpad only when using Blender.
And if I’m going to do it, I also added Function Keys. I can type Function Keys by layer modification in MiniVan. Still, it’s useful if there are independent Functions especially for the shortcuts.
In this wide shape, enough ergonomic for human body, especially the shoulders. Needs no splitting. You can’t place a drink on the middle, but single keyboard makes your desk organized.
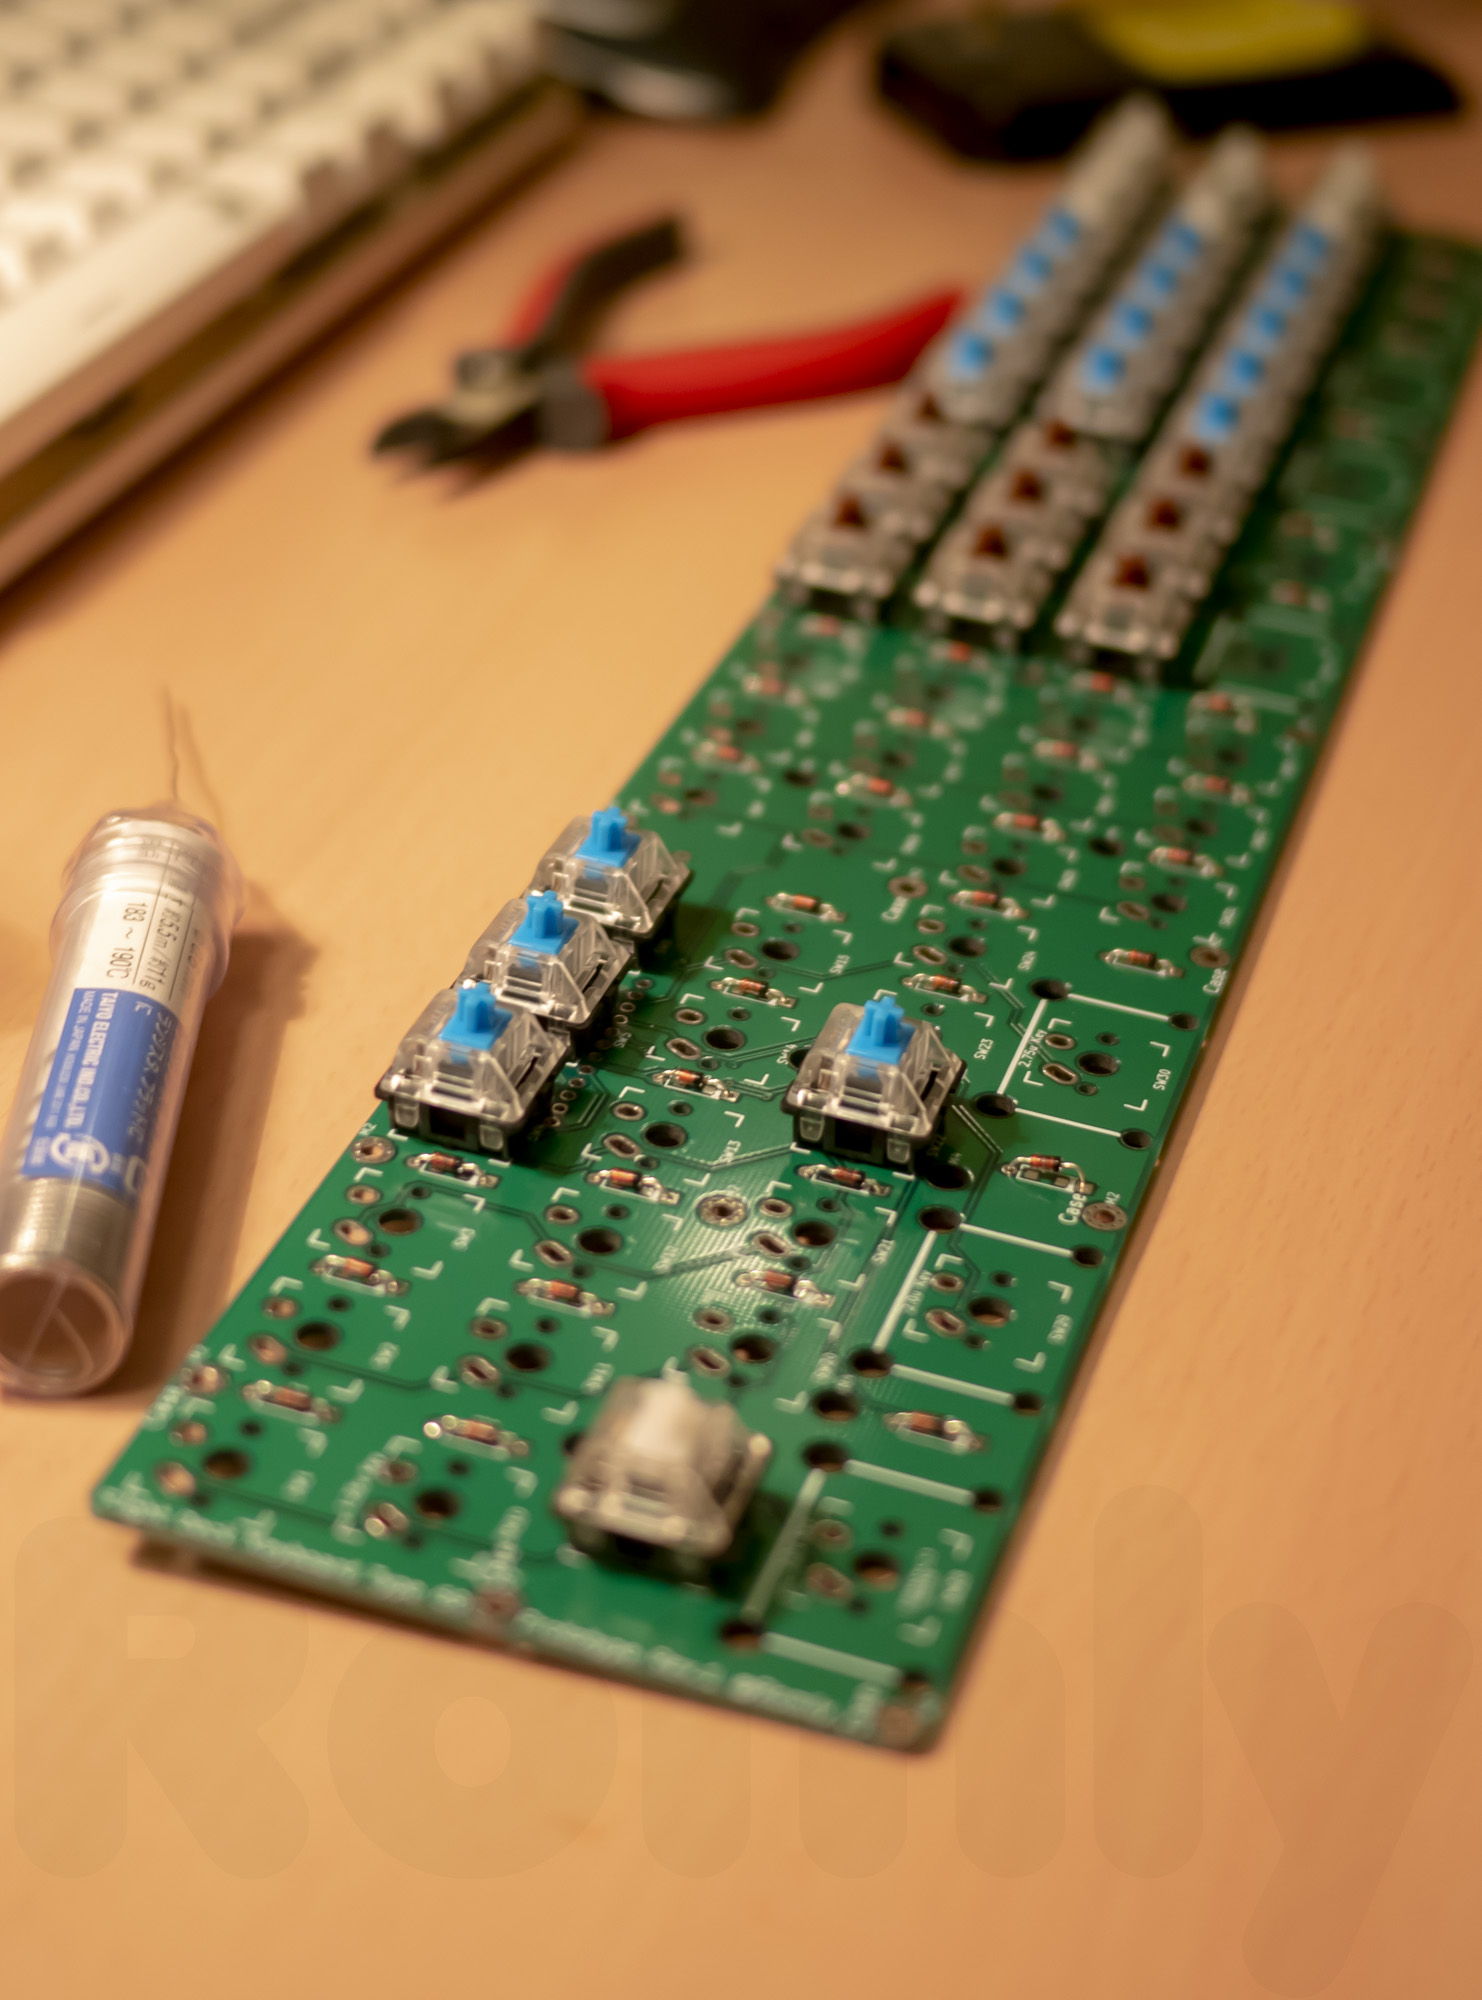
There are no difficulties for building. Though it’s takes time because of the number of keys. I have to solder diodes as same number as keys. I used a few variety of switches for each places.
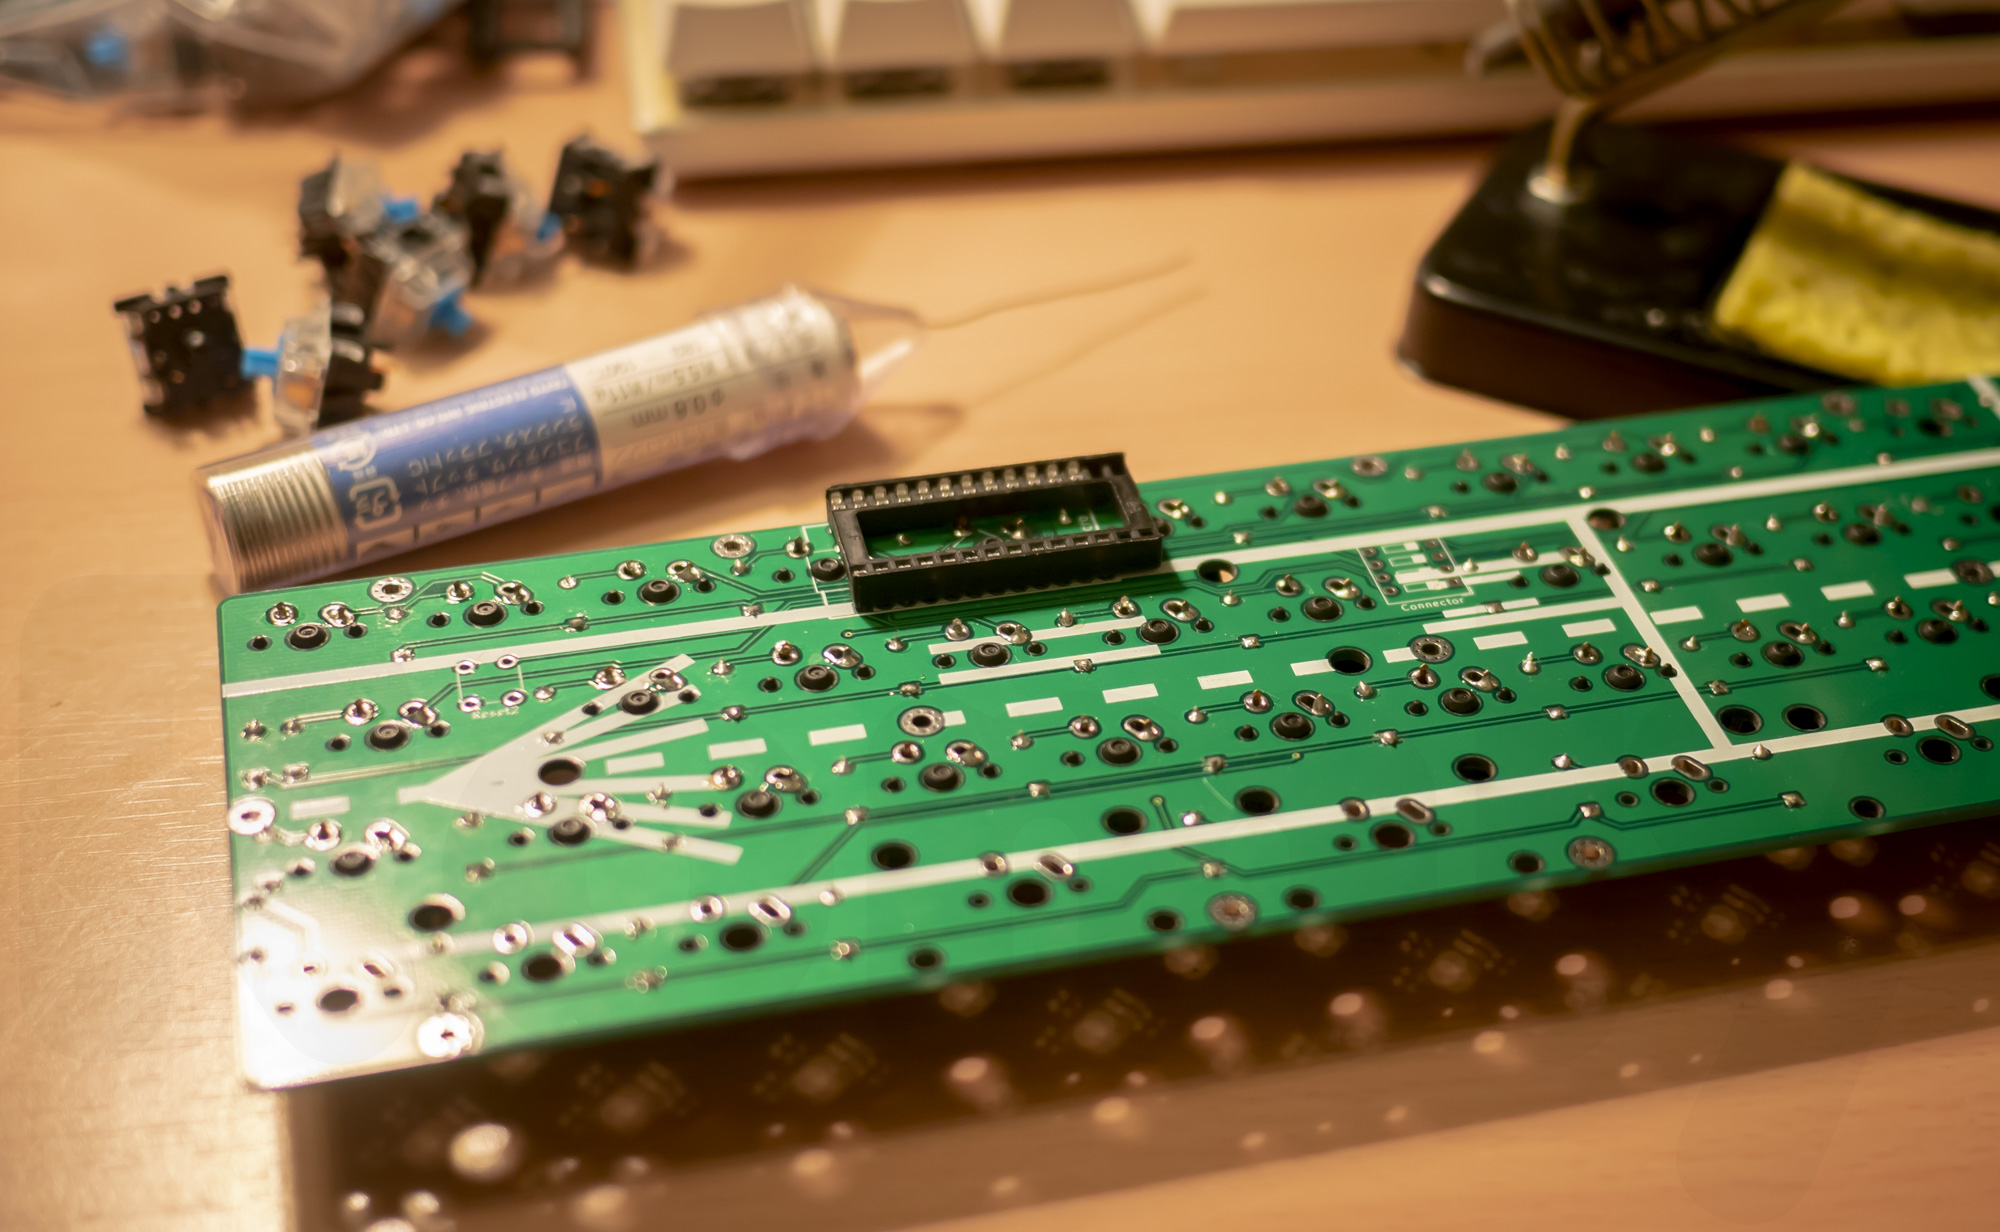
I made Pro Micro as socket in style. Just in case.
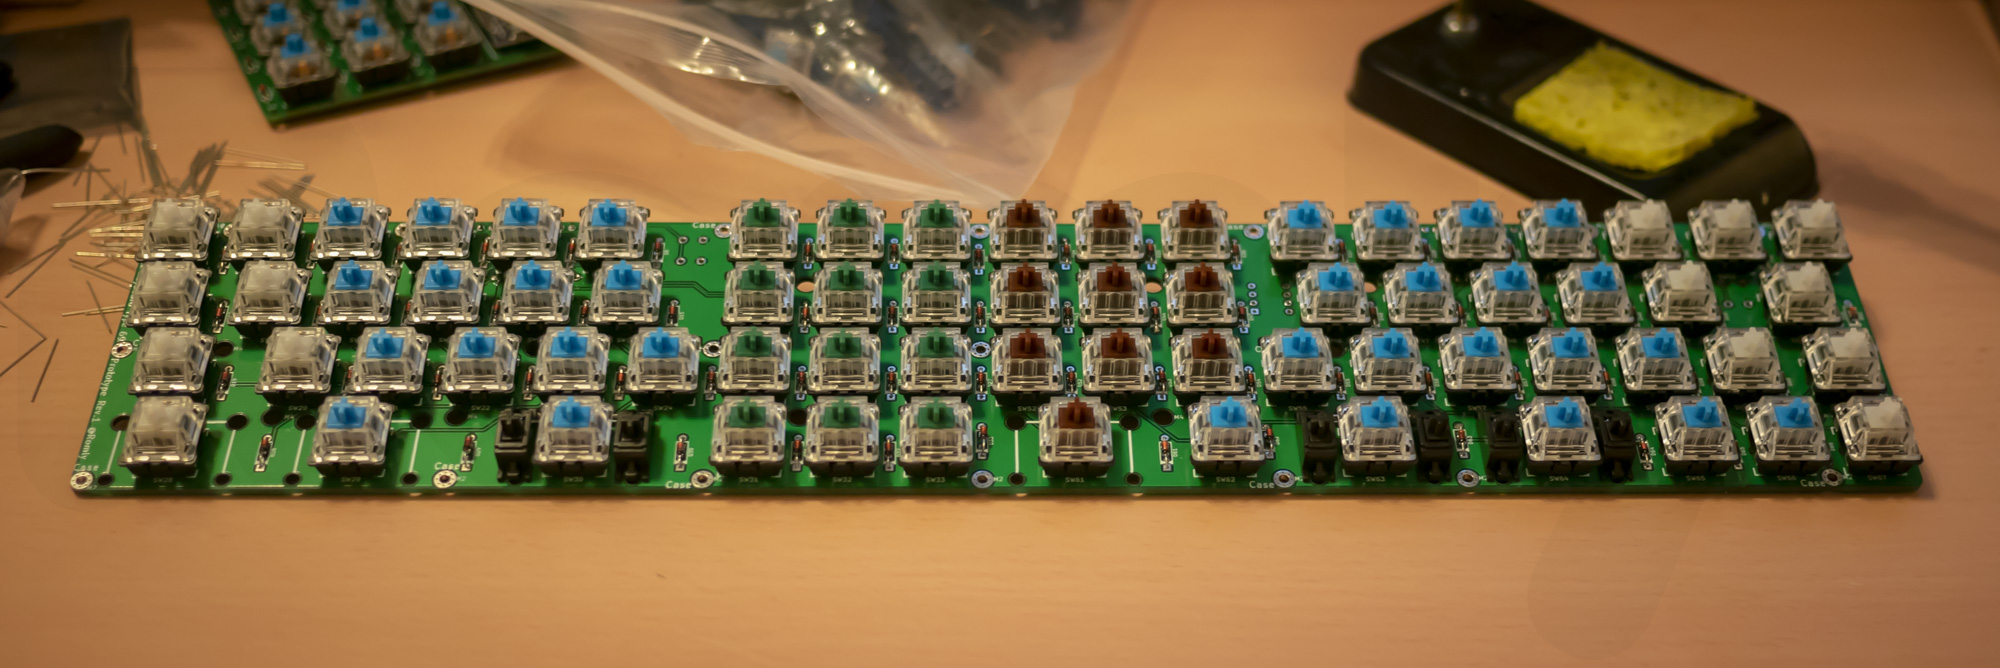
Finished soldering. Mainly Gateron Blue. Lightweight translucent white for little fingers. Thock thock Brown for Numpad and lively Green for Function Keys. The width is almost same as 100% full keyboard but only 4 rows, makes super narrow and long. It is a flight-deck.
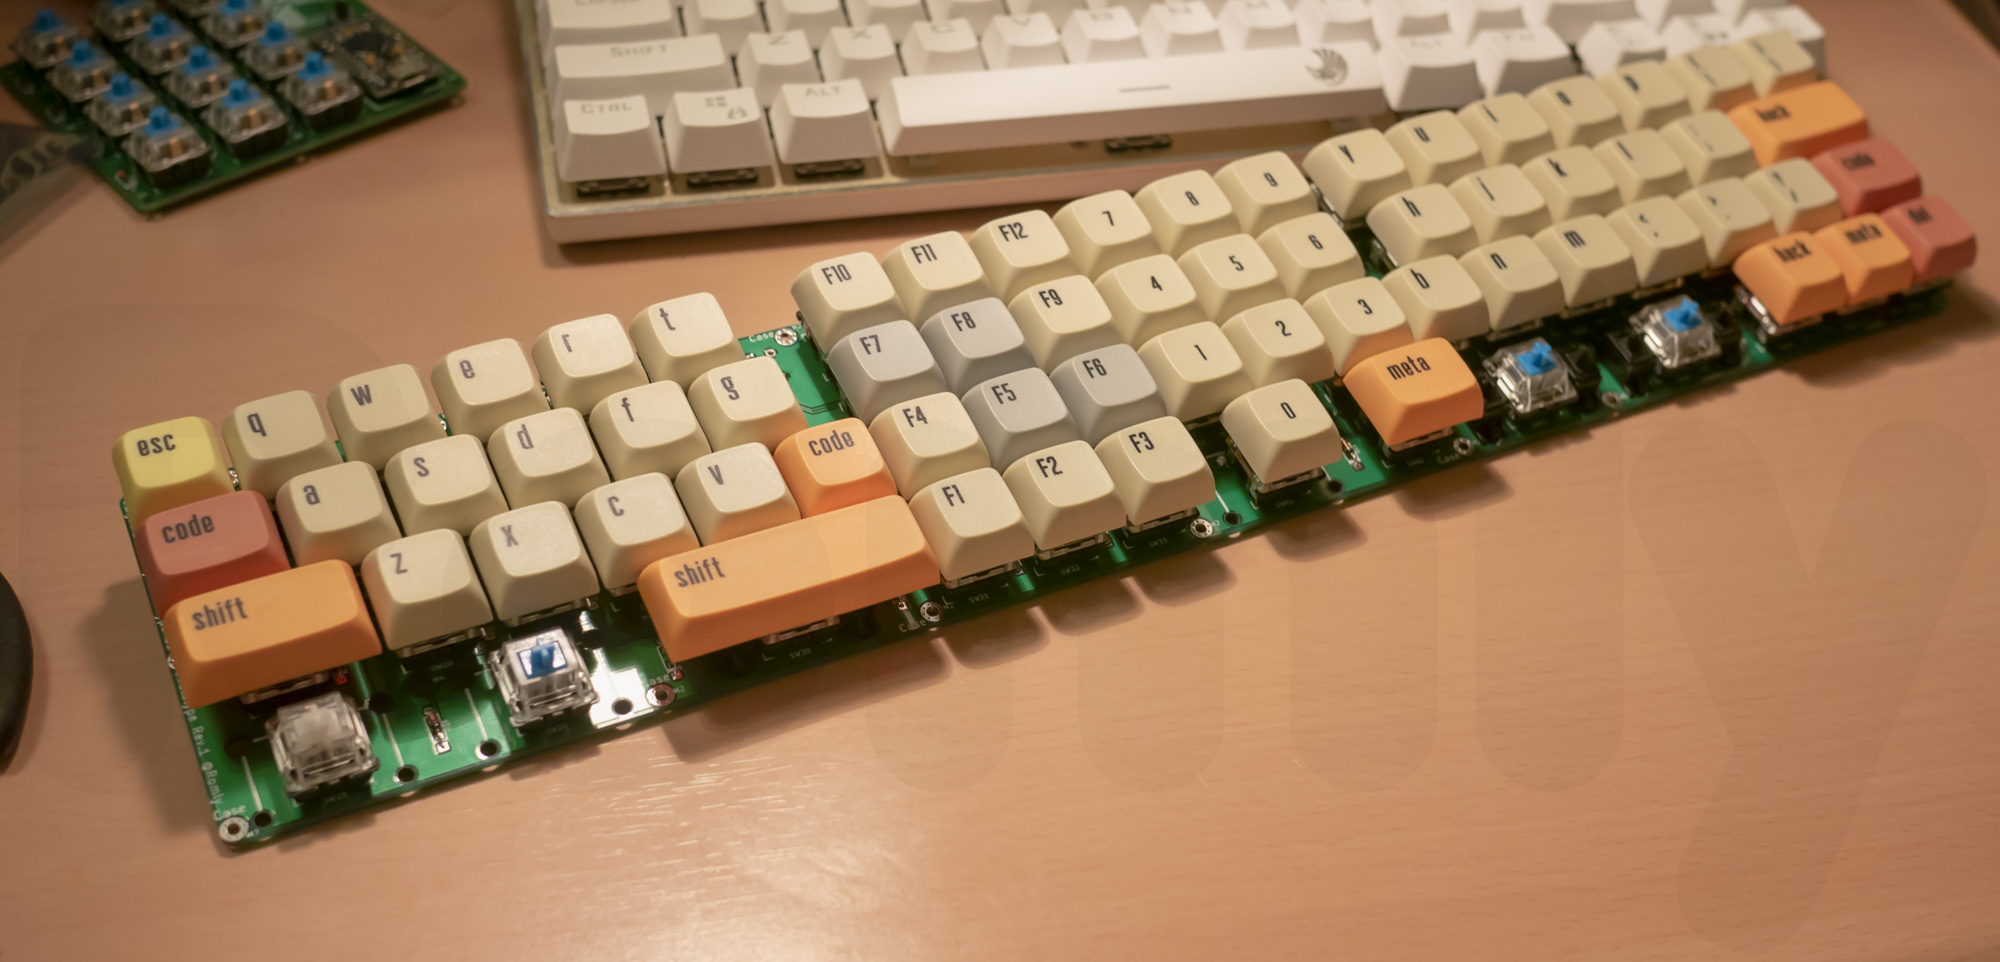
I used left-over MiTo Canvas XDA keycaps. The layout requires many keys over 1u, so I couldn’t fill them. I exhibited this at TokyoMK5 last August. So you might saw this if you were there.
Finally I needed a software for Pro Micro to make this keyboard work. But I don’t understand QMK at all. So I wrote a simple program myself with Arduino.I have done once with fewer keys, so I modified the program for more keys. I can’t say it was easy (cuz I’m an amateur) but I could make it work with this long keyboard.
No outer case, but Pro Micros makes comfortable angle. It’s naked, still I can use this as a keyboard. So I’ve been used this for a while, and I realized that the layout I presumed in my mind, and actually using it, is very different.
What I noticed after building/using it.
⌨️Layout
I leave Windows Key out too much.
Windows key is like pain in the ass. I often mistype it instead of Alt. But it’s necessary key for Windows. So I moved Windows Key to right bottom. But it was a bad decision. Most shortcut keys using with Windows Key is on the Left. So I should’ve keep it on the Left.
Want Y to be on the Left too.
When using Blender, I have to type Y as shortcut for Y-axis move with left hand. On normal keyboard, I can type Y with left index finger with little jump. But on this Flight Deck Keyboard, I can’t because of distance of left and right part.
Needs NumLock.
I forgot put a Num Lock even I layouted Numpad. So I can’t switch the Num Lock state. I guess Num Lock is necessary if I layout Numpad.
Want /(slash) in Numpad.
I forgot to place for /, which is very important shortcut key for Blender, toggles global view and local view.
🛠️Problems for building.
It costs, if it’s big.
It’s simply big, so it costs money for PCB. And if I tried to make case for this with acrylic plate, I assume it also costs much. I wanted to make outer case with 3D printing, but… I don’t want to think about the cost of this size of Nylon print. I really think that it will costs, if it’s big.
It’s hard to gather keys which bigger than 1u.
I consider layout using keyboard-layout-editor.com. I planed where I want keys to be first, and then fill the gaps with changing the key sizes. So I didn’t care about key sizes at all. In the result of doing so, it requires 5 of 2u, 2 of 1.75u and so on. Default 100% keyboard’s keycaps doesn’t cover it. I think using 1u key only is simple and easy solution for that. But it’s like a limitation of creativity by building issue… so… Trading off, I guess.
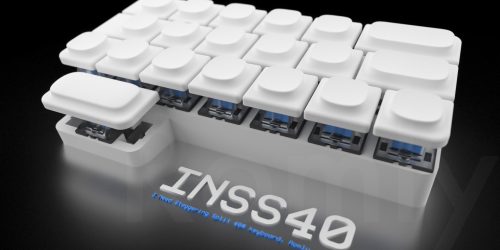
So, if I make second version of Flight Deck Keyboard in the future, I will consider things such as above. But as I said, the size matters for me on costs. I felt very comfortable with this width, so I’m gonna revenge someday but I should focus compact keyboard such as INSS40 which I planed before.
So this is my #DIY #MechanicalKeyboard.⌨️ I ordered #PCB and #3Dprinting case already. I hope I didn't make mistakes, and combine as I aimed.😣 Btw the name is #Thumbxy! Cuz it catches thumb's X and Y axis movement.📈#blender #KiCad pic.twitter.com/kB1AS1bmGp
— Romly@C95 日曜日 東ナ-17a (@Romly) 2018年12月8日