Road to build my own keyboard part 9: 3D printed case arrived!
This post is English version of “完全自作キーボードへの道9:ケースの3Dプリントが到着!“. Please be patient with my poor English!🙇
I’m trying to build my own keyboard leisurely, I named it INSS40 keyboard. It means that “I need staggering split 40%“. At the last post “My own keyboard “INSS40” right part design complete!“, case design was completed. Now I got 3d printed case so let me share it with photos.
3D printed actual object really lifts me up! I think it is finished product except it doesn’t work😁
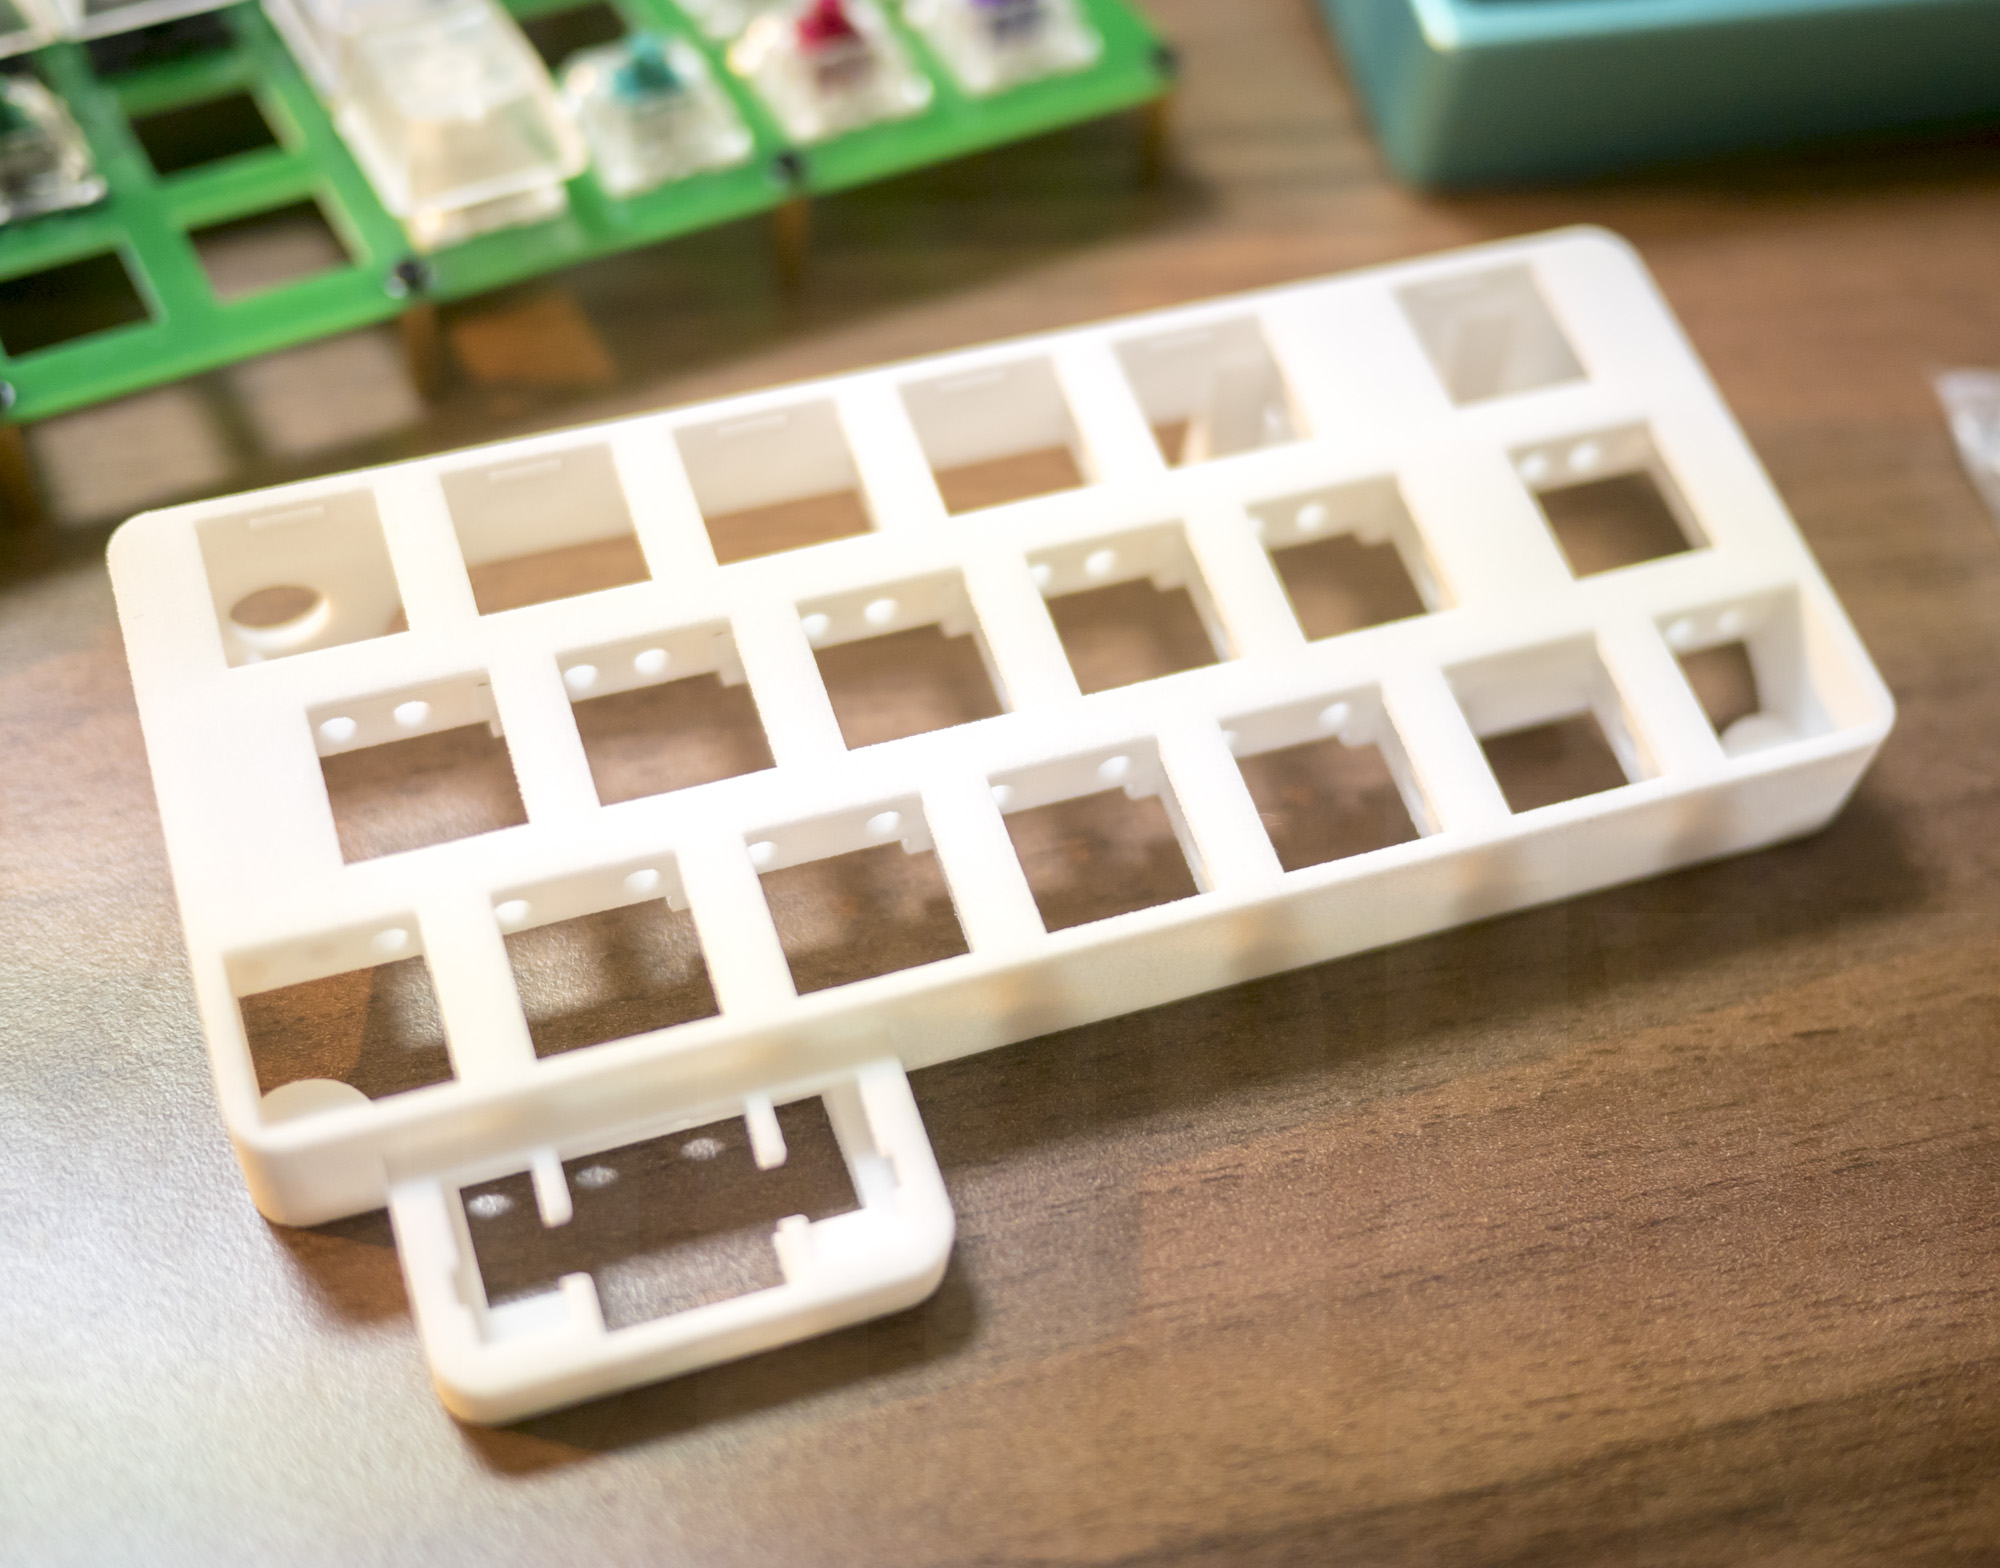
Behold! This is 3D printed INSS40 keyboard (right part). At first glance, It went very well. Just as I expected. I can’t stop smiling. I really do like 3D printed nylon material. I hope that household version of SLS nylon printer will be released soon.
* Right now, there is SLS nylon printer project at Kickstartar. It says €5,999, it’s around 800,000 Japanese yen?😅
It’s an early bird price, so 1.5 million yen if it comes onto the market? Too, too expensive to own but I hope the price keep dropping.
www.kickstarter.com
1440 Shares
4 Pockets

https://www.kickstarter.com/projects/328737298/vit-3d-printer-high-quality-la...
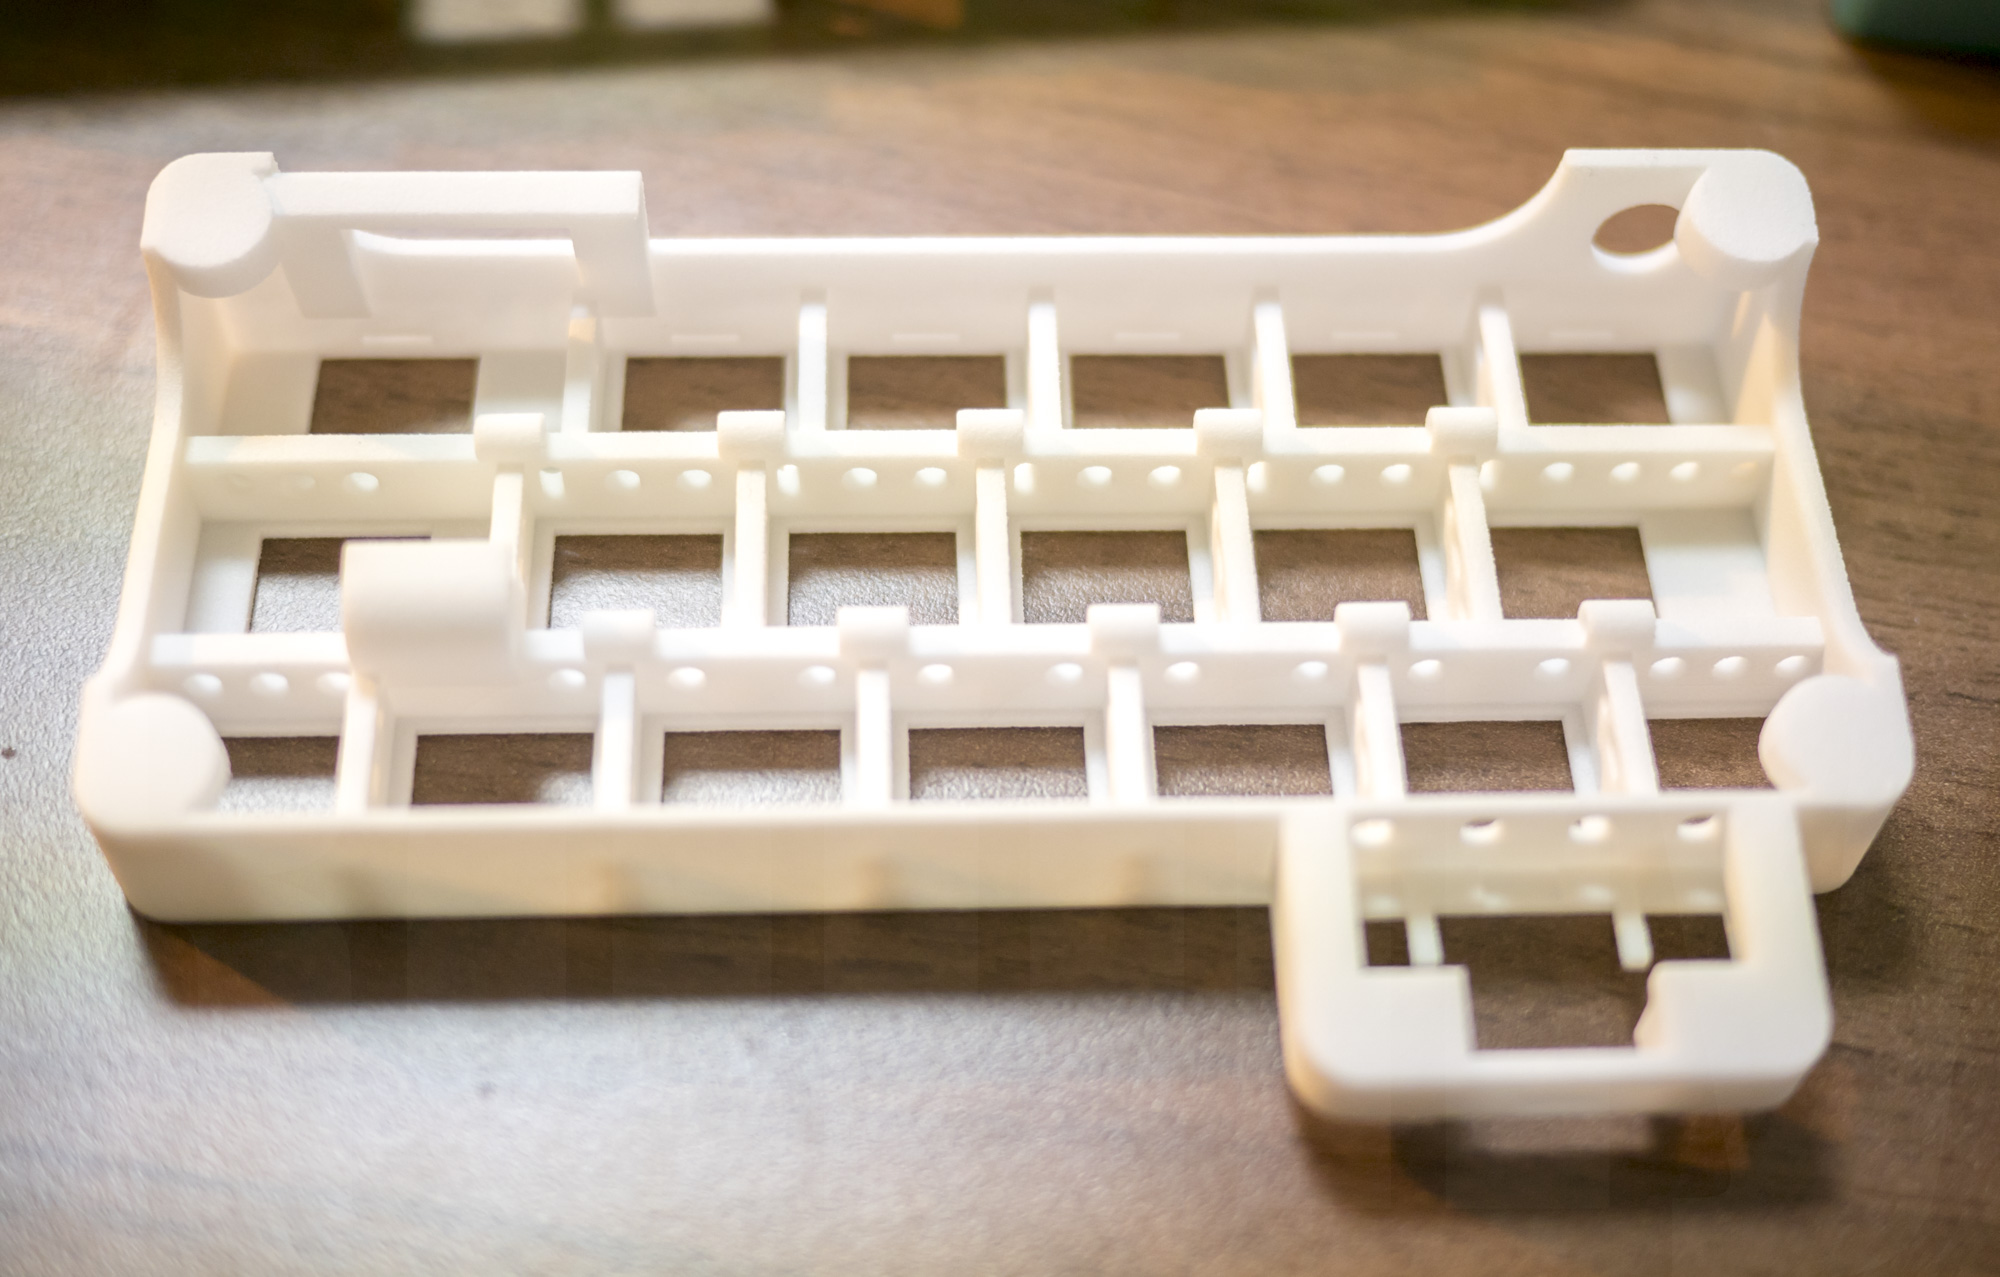
Bottom view. The bone structure goes well, no strength problem. Holes for wiring looks functionable. Looks so wicked isn’t it? [I’m blowing my own horn😏]
Holes for wiring. Threading through these holes keeps wire organized, I hope. But I don’t know at all. I’ve never done the wiring before😛
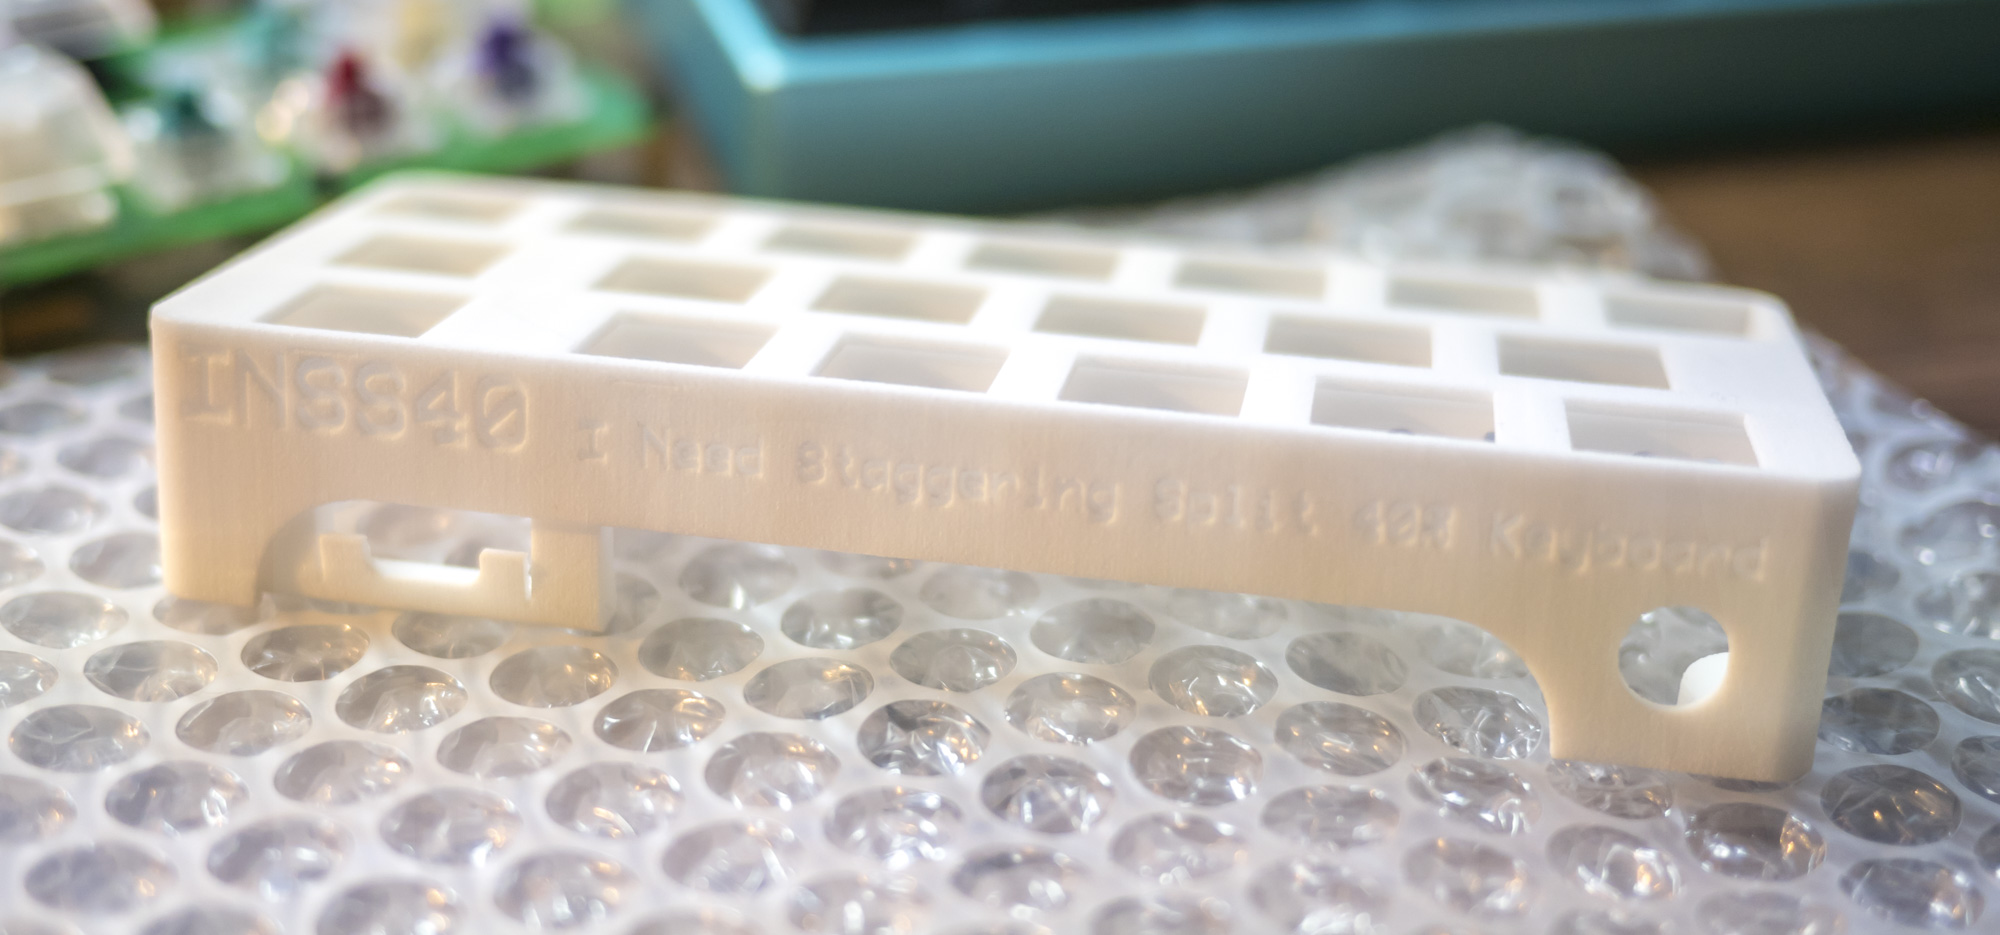
Backside. Branding is beautifly succeed. Little bit hard to read at this image, but you can read easily if you see the real one. There is unknown line appears near two keyholes from the left. I don’t know what causes it even though I check the model data.
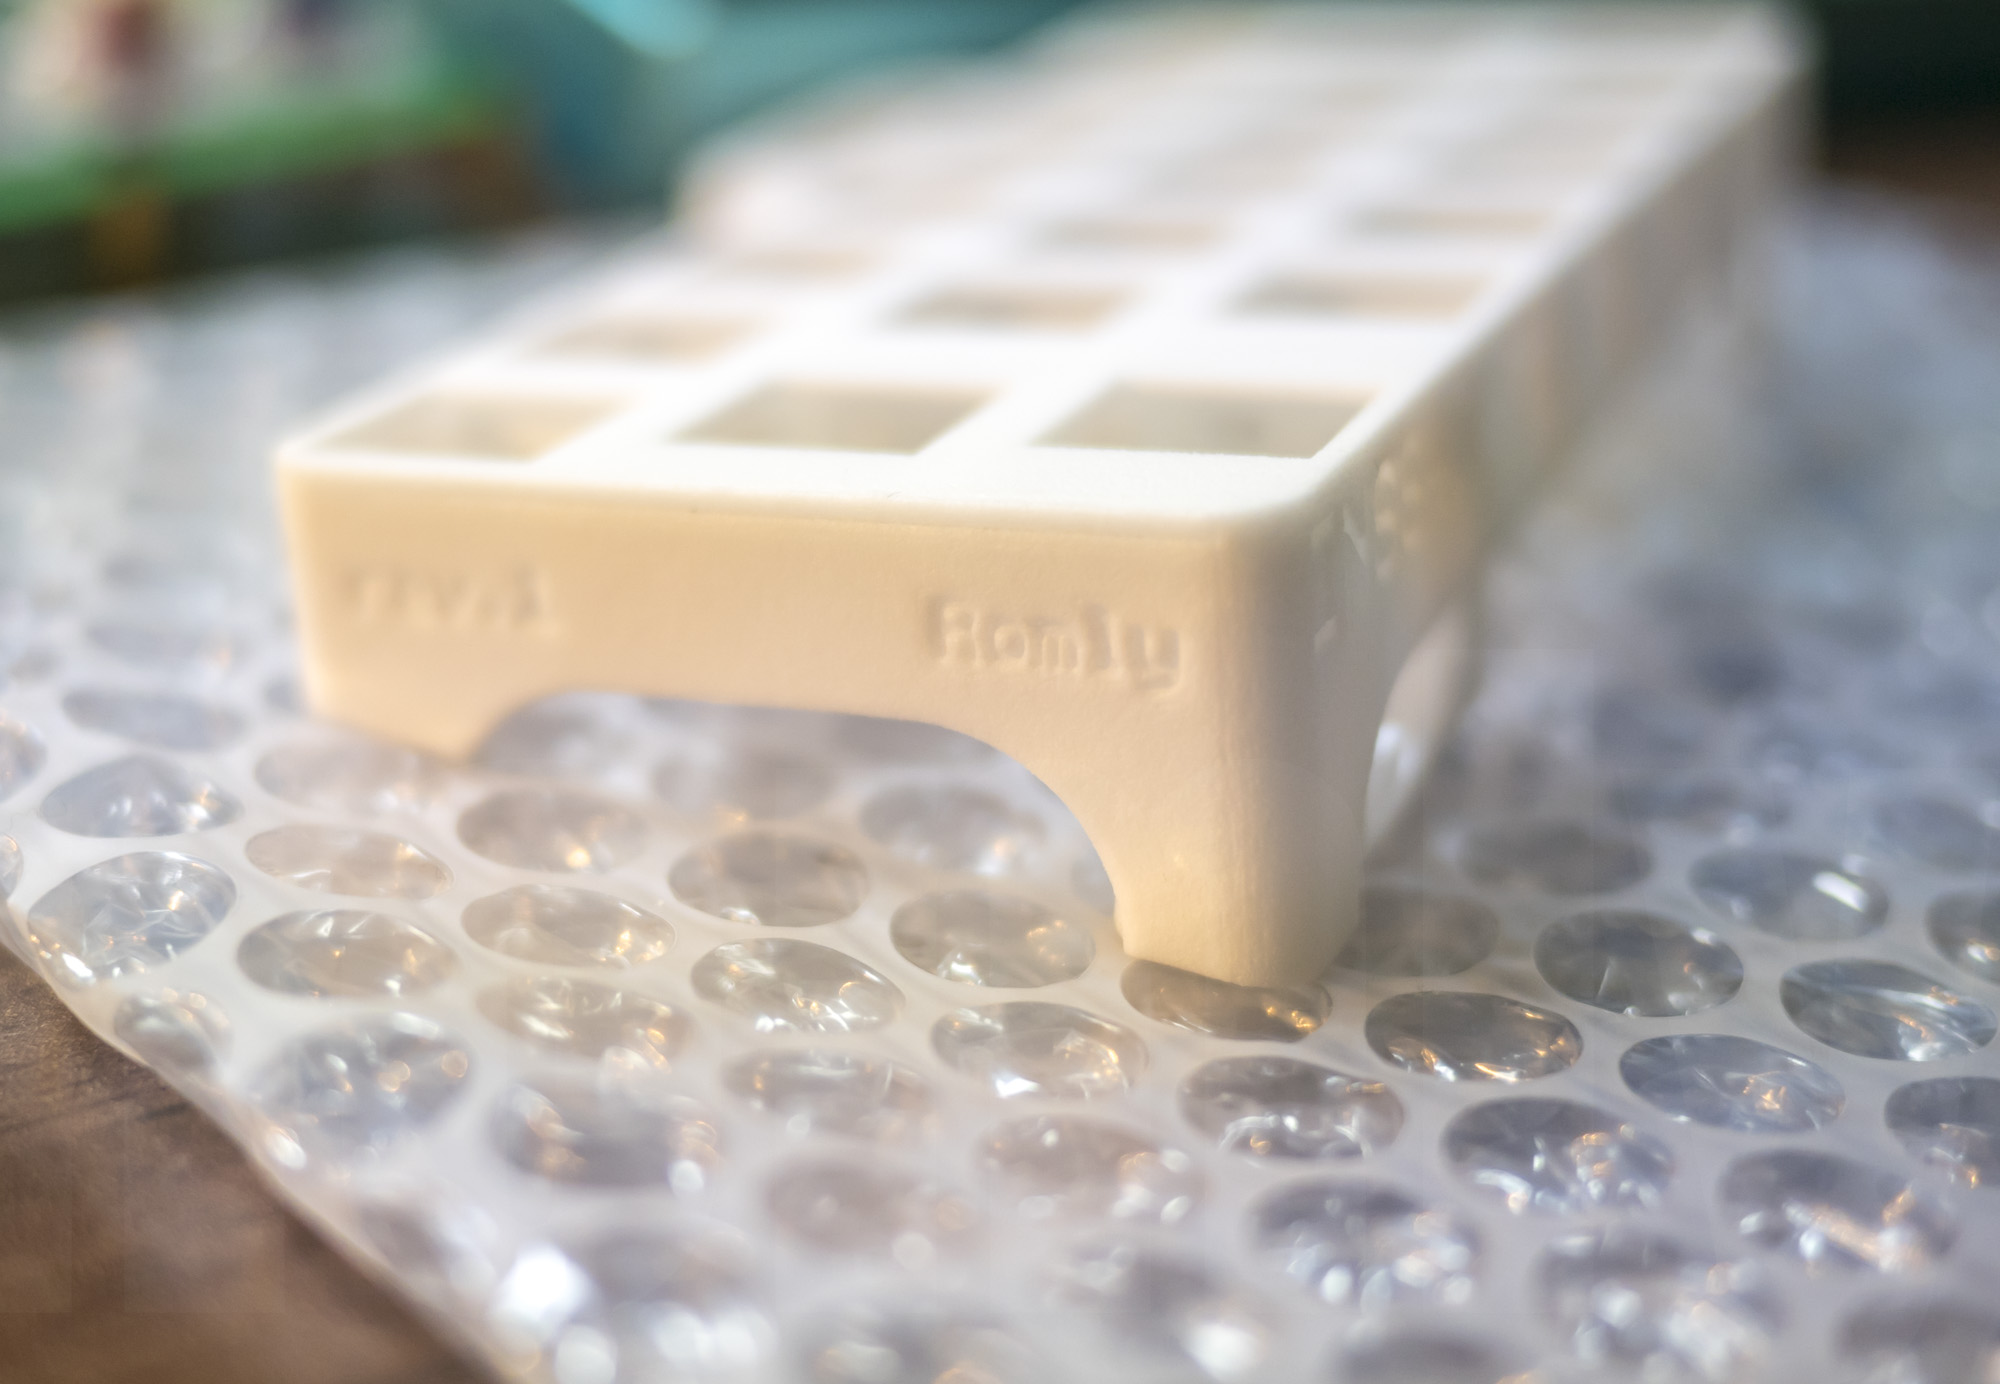
I put my name on the right side. Here again, unknown line… It is ignorable, just I’m wondering why.
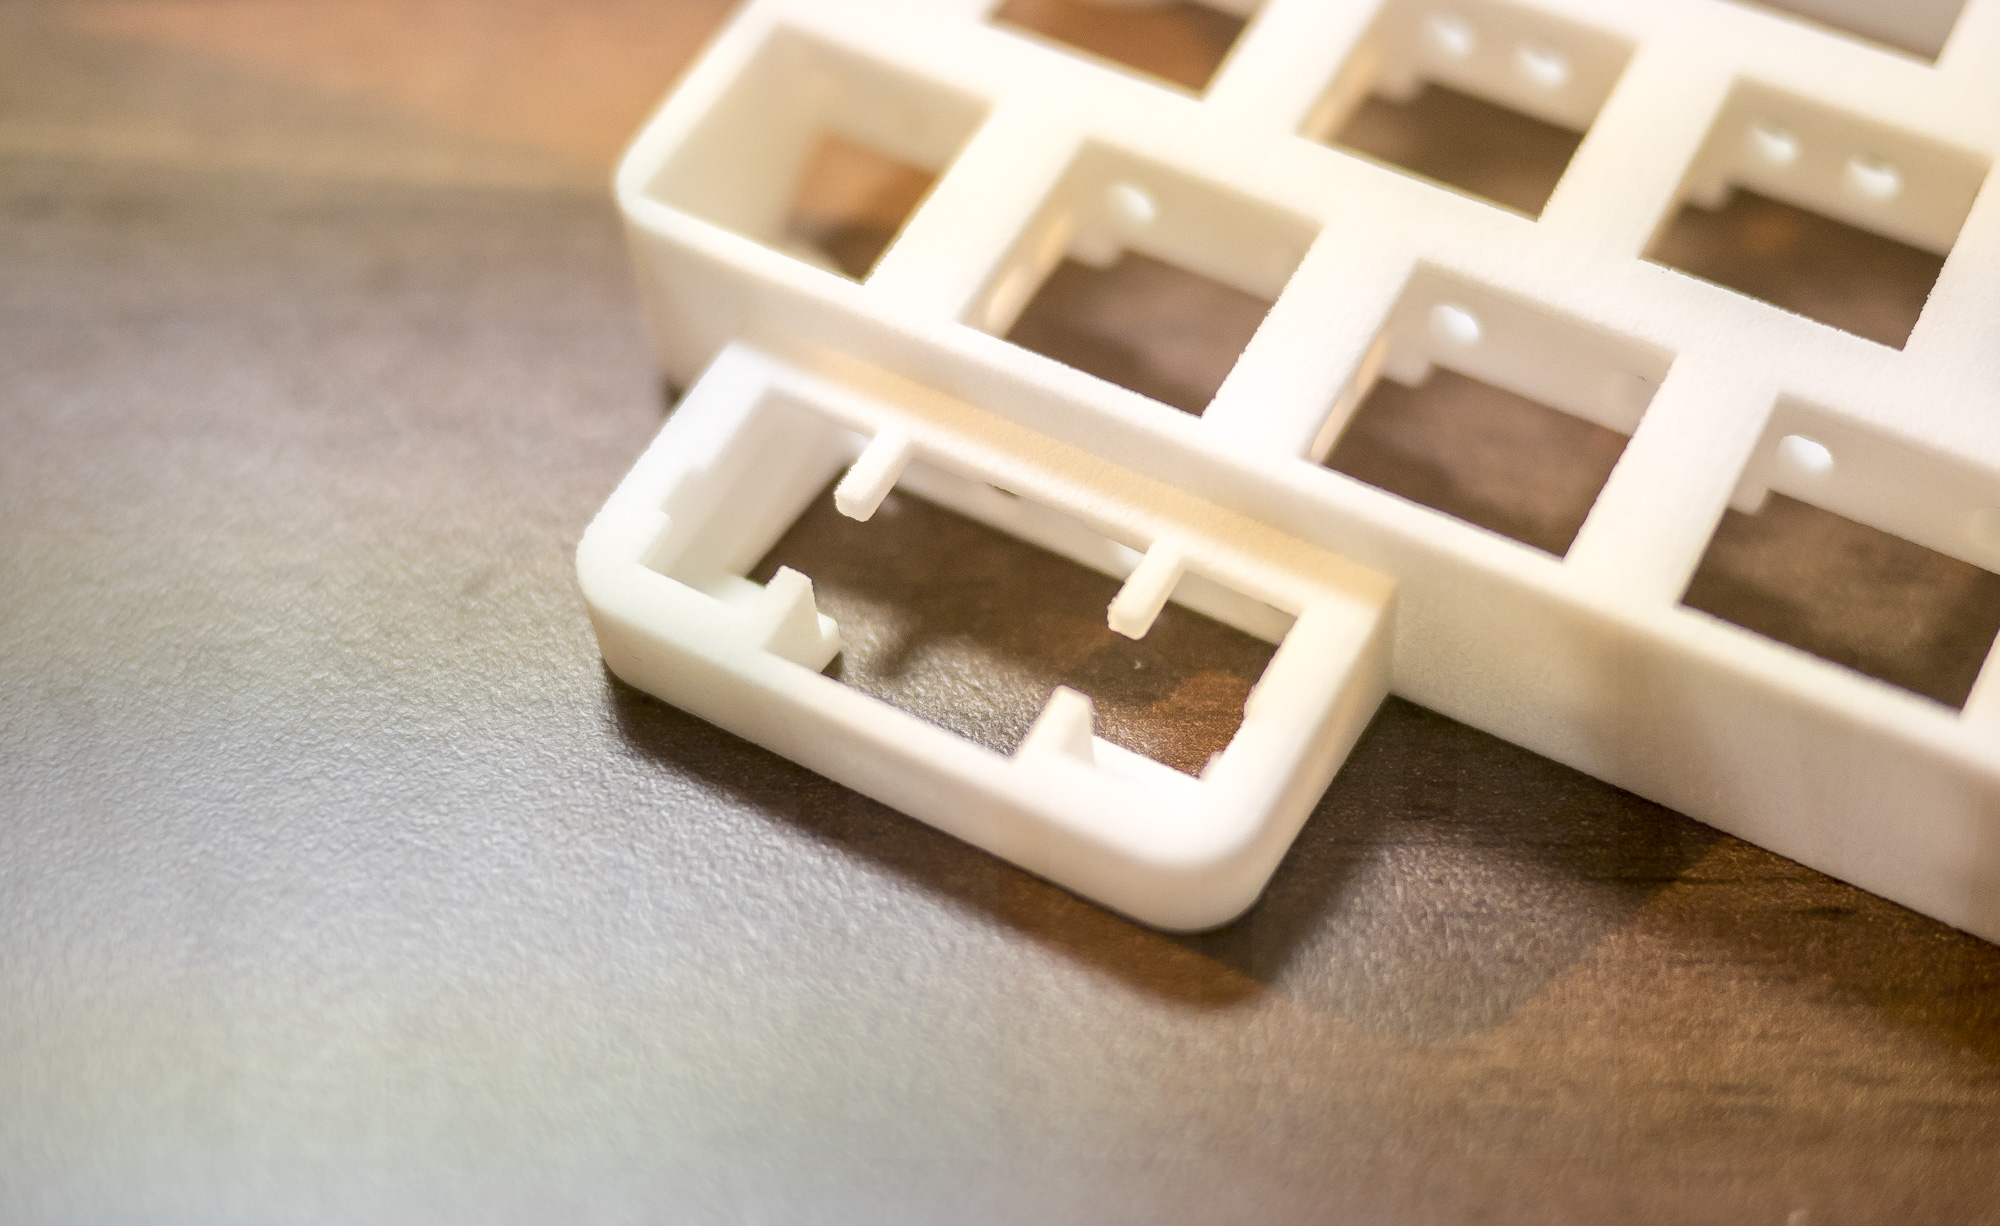
Thumb key hole suppose to be used with cherry plate-mount stabilizer. These thin structure which I was very concern about, seems okay. These structure has 1.5mm2, 5mm length. Of cause easily break if you put pressure directly, but enough strong to use proper way. Nylon are strong!
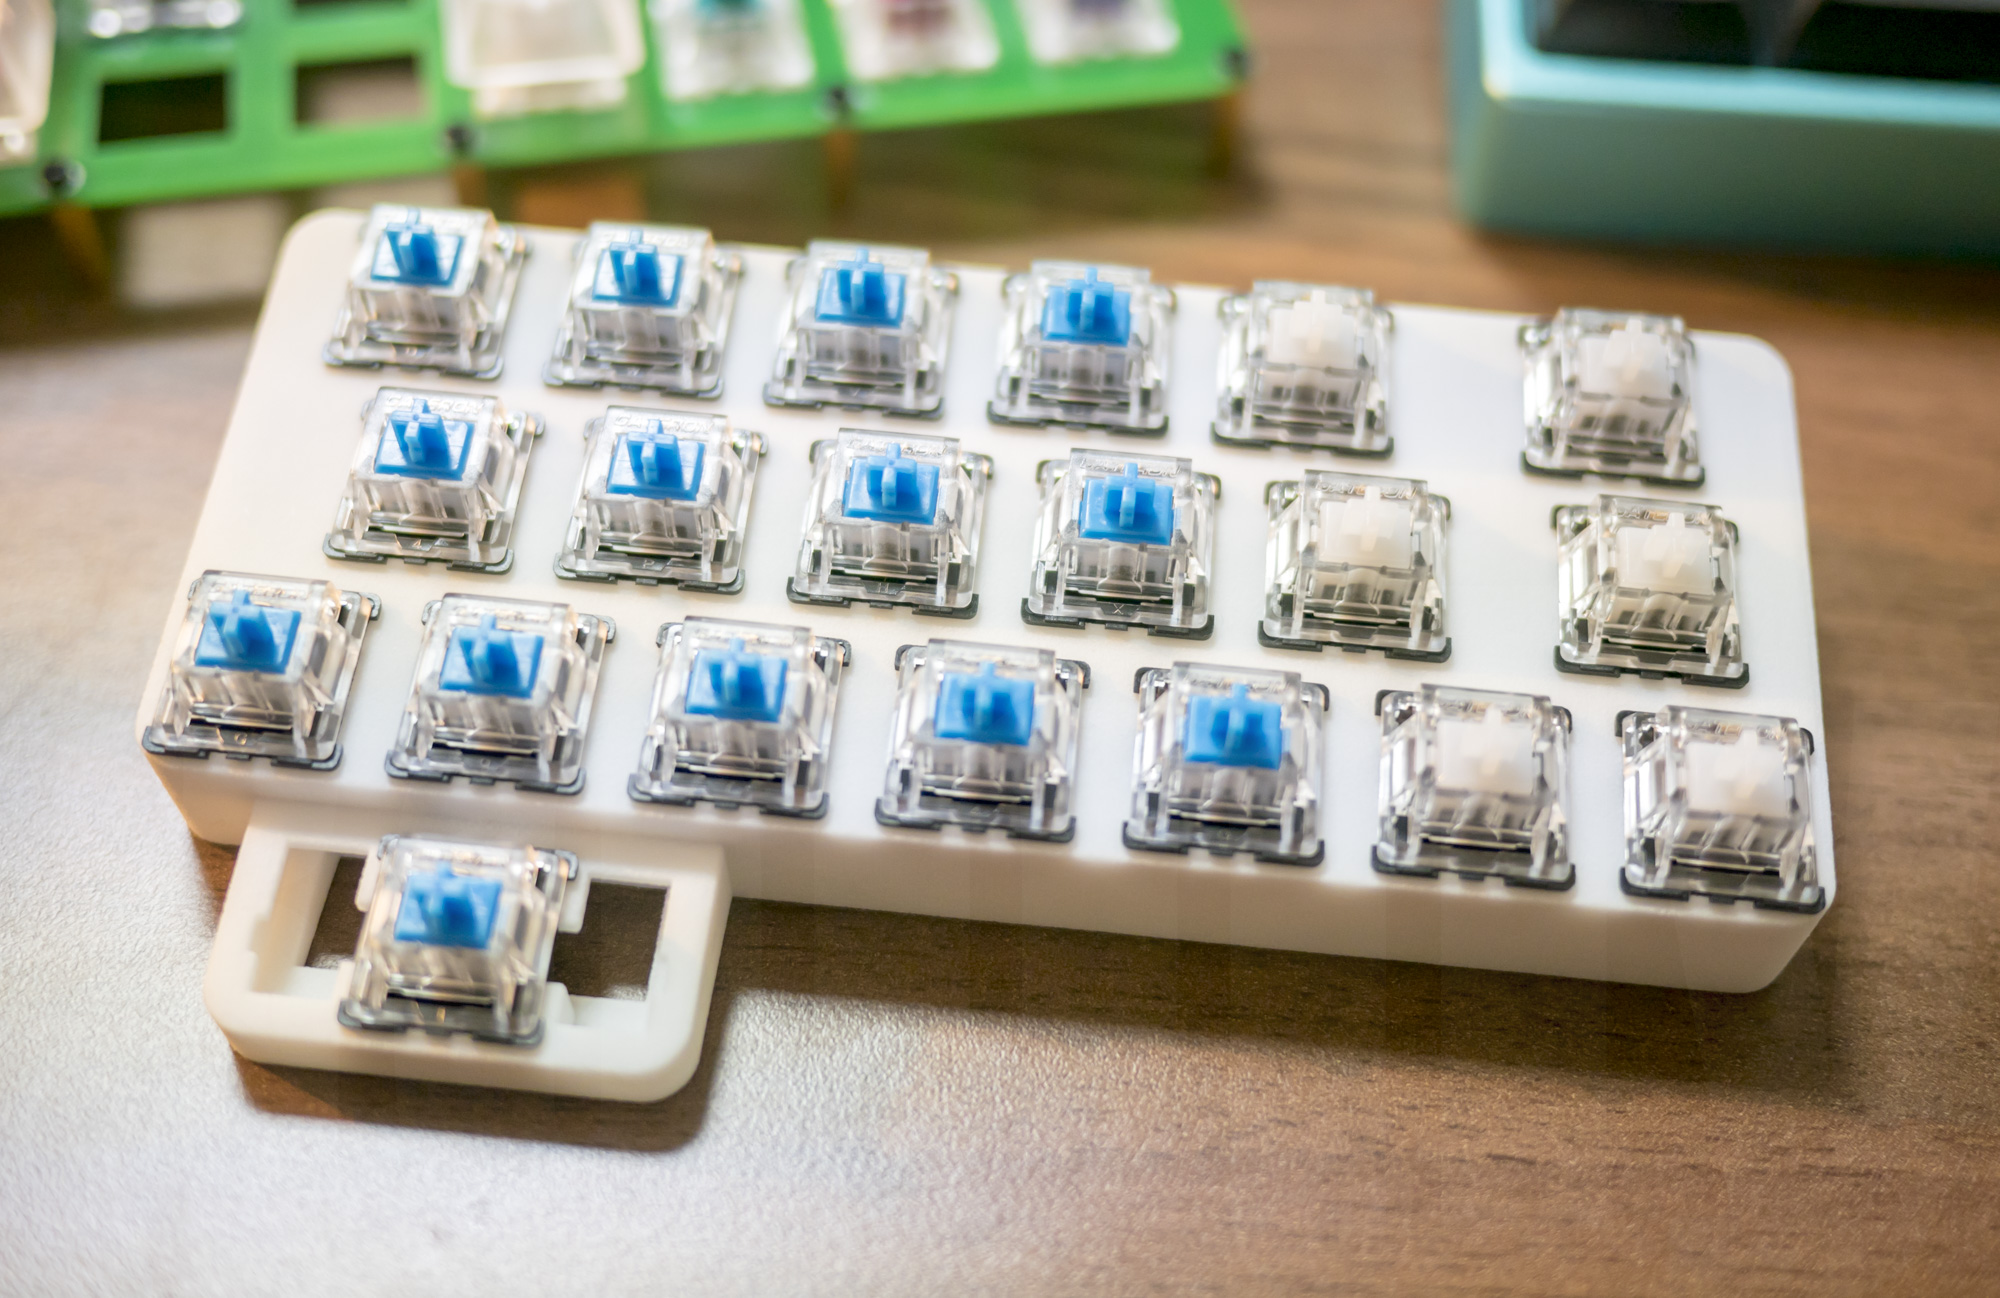
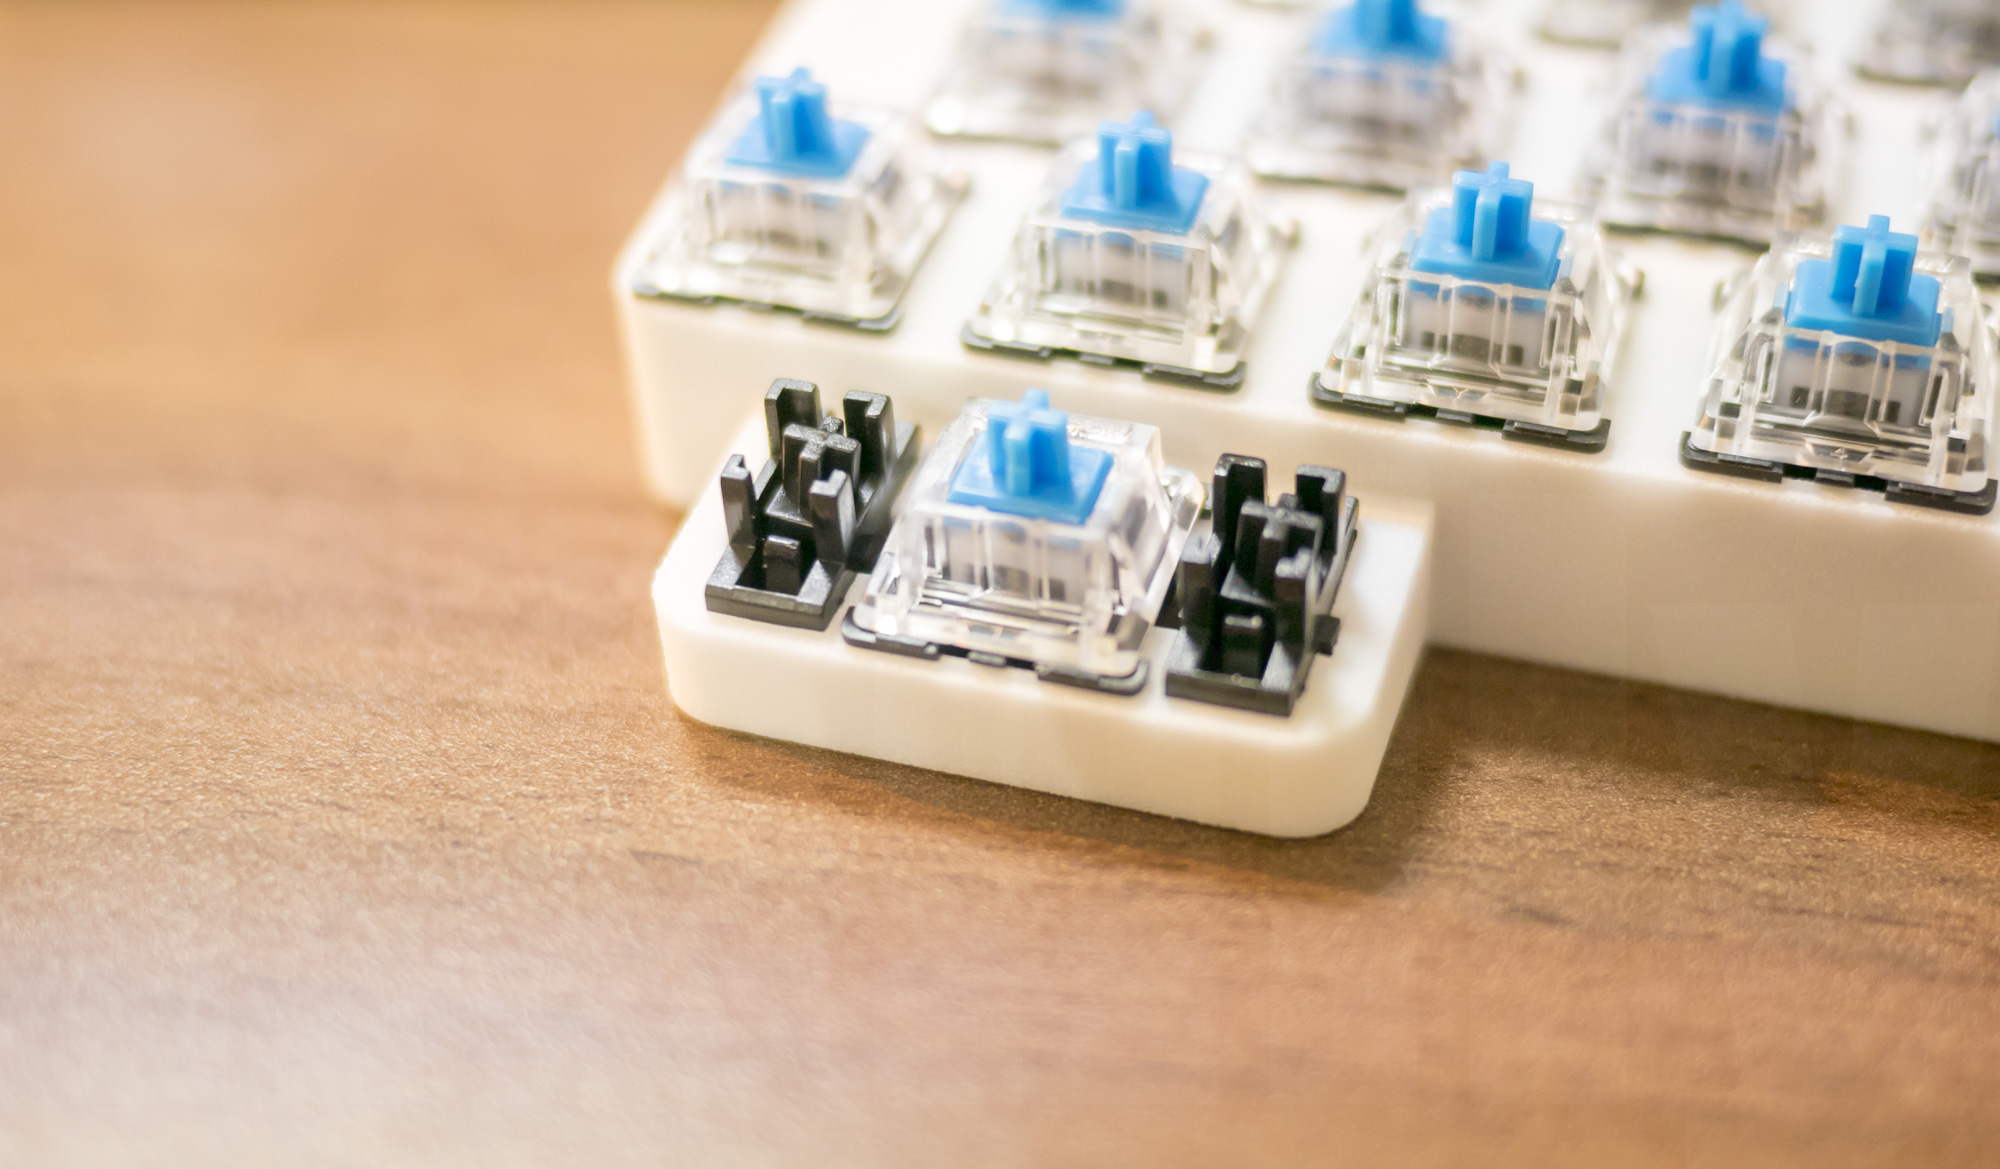
Ok time to put switches. If switches aren’t fit, it will be just a garbage. Here I put Gateron blue switches. Fits perfect! Cool!
I’m super glad that my own keyboard getting close to completion step by step. It really doesn’t matter but I put clear switches for the keys which pushed by pinkies. 35g weight, light!
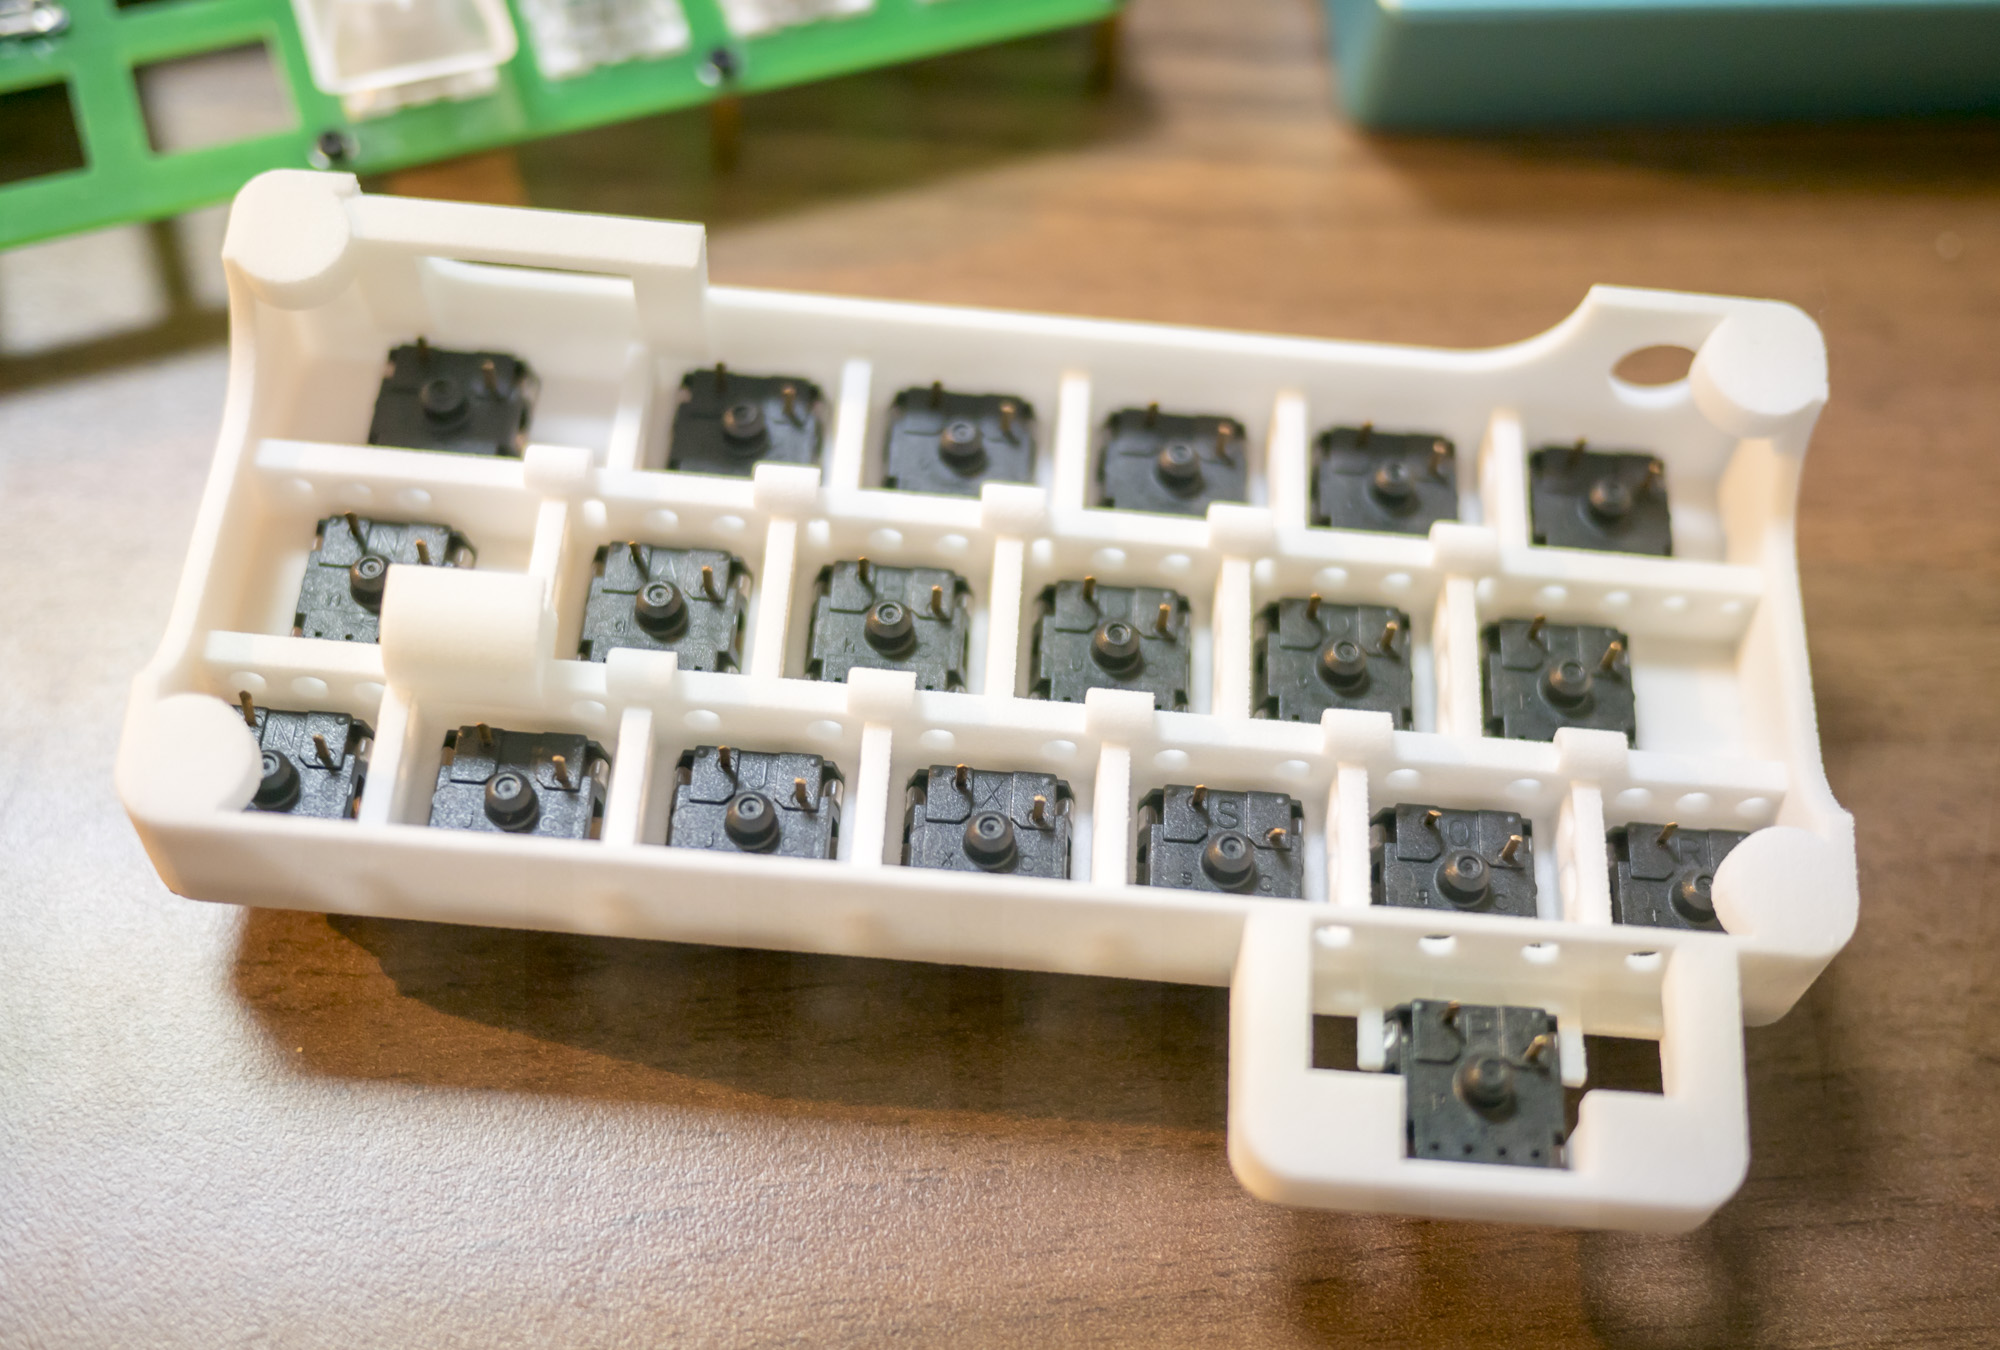
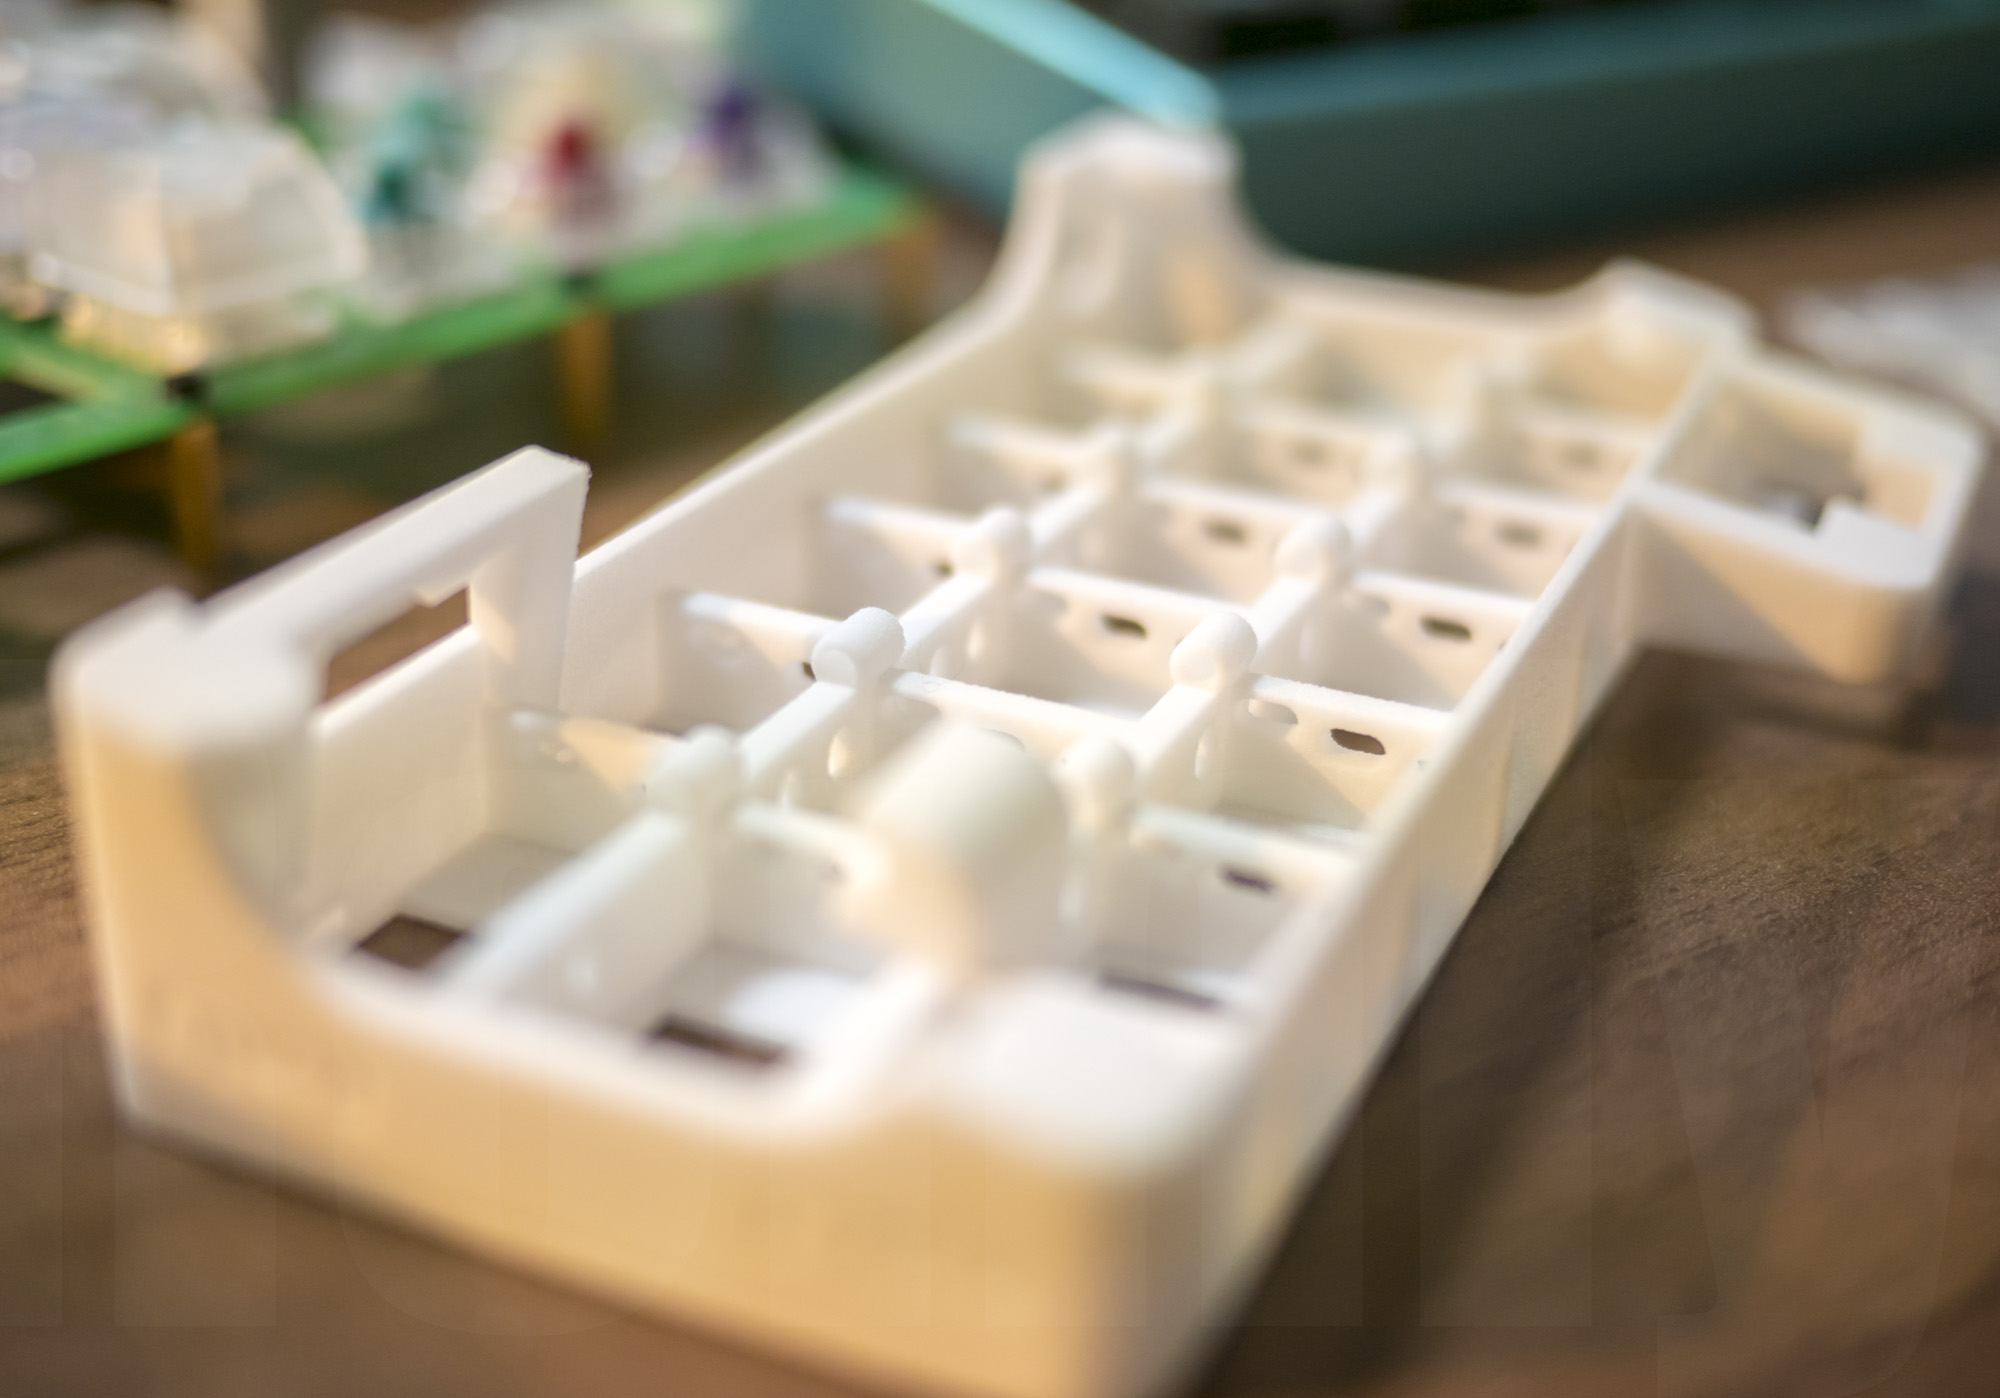
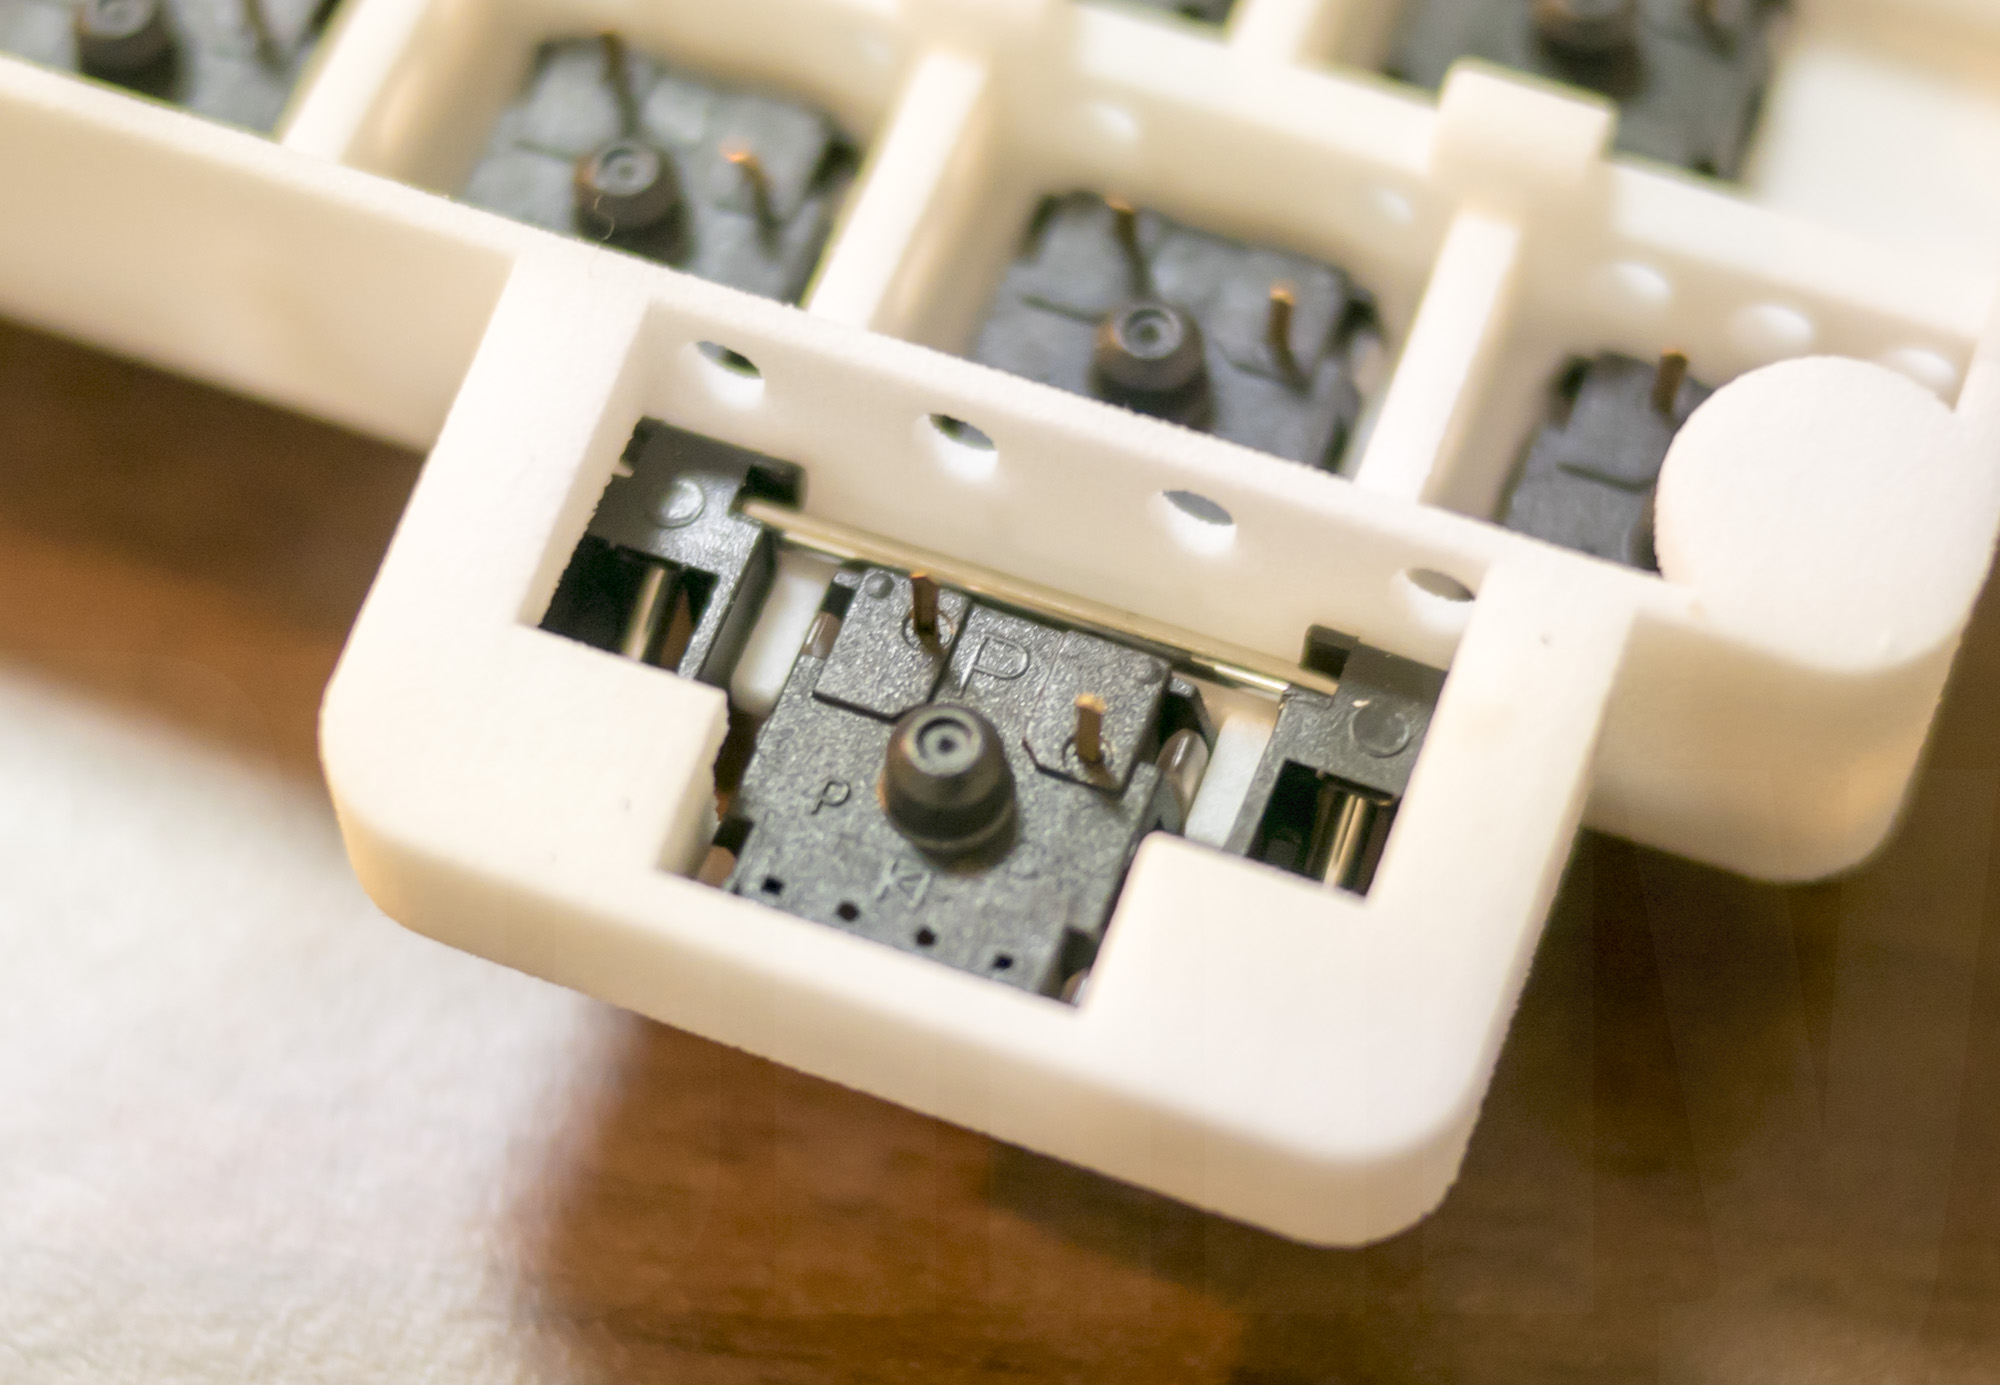
Bottom view with switches. I can see each pin clealy, it might helpful to wiring. I hope. I wish. Thumb key switch pins barely touch the bottom. But if I put rubber feet, It goes higher a few millimeters. Maybe I could make thumb key lower.
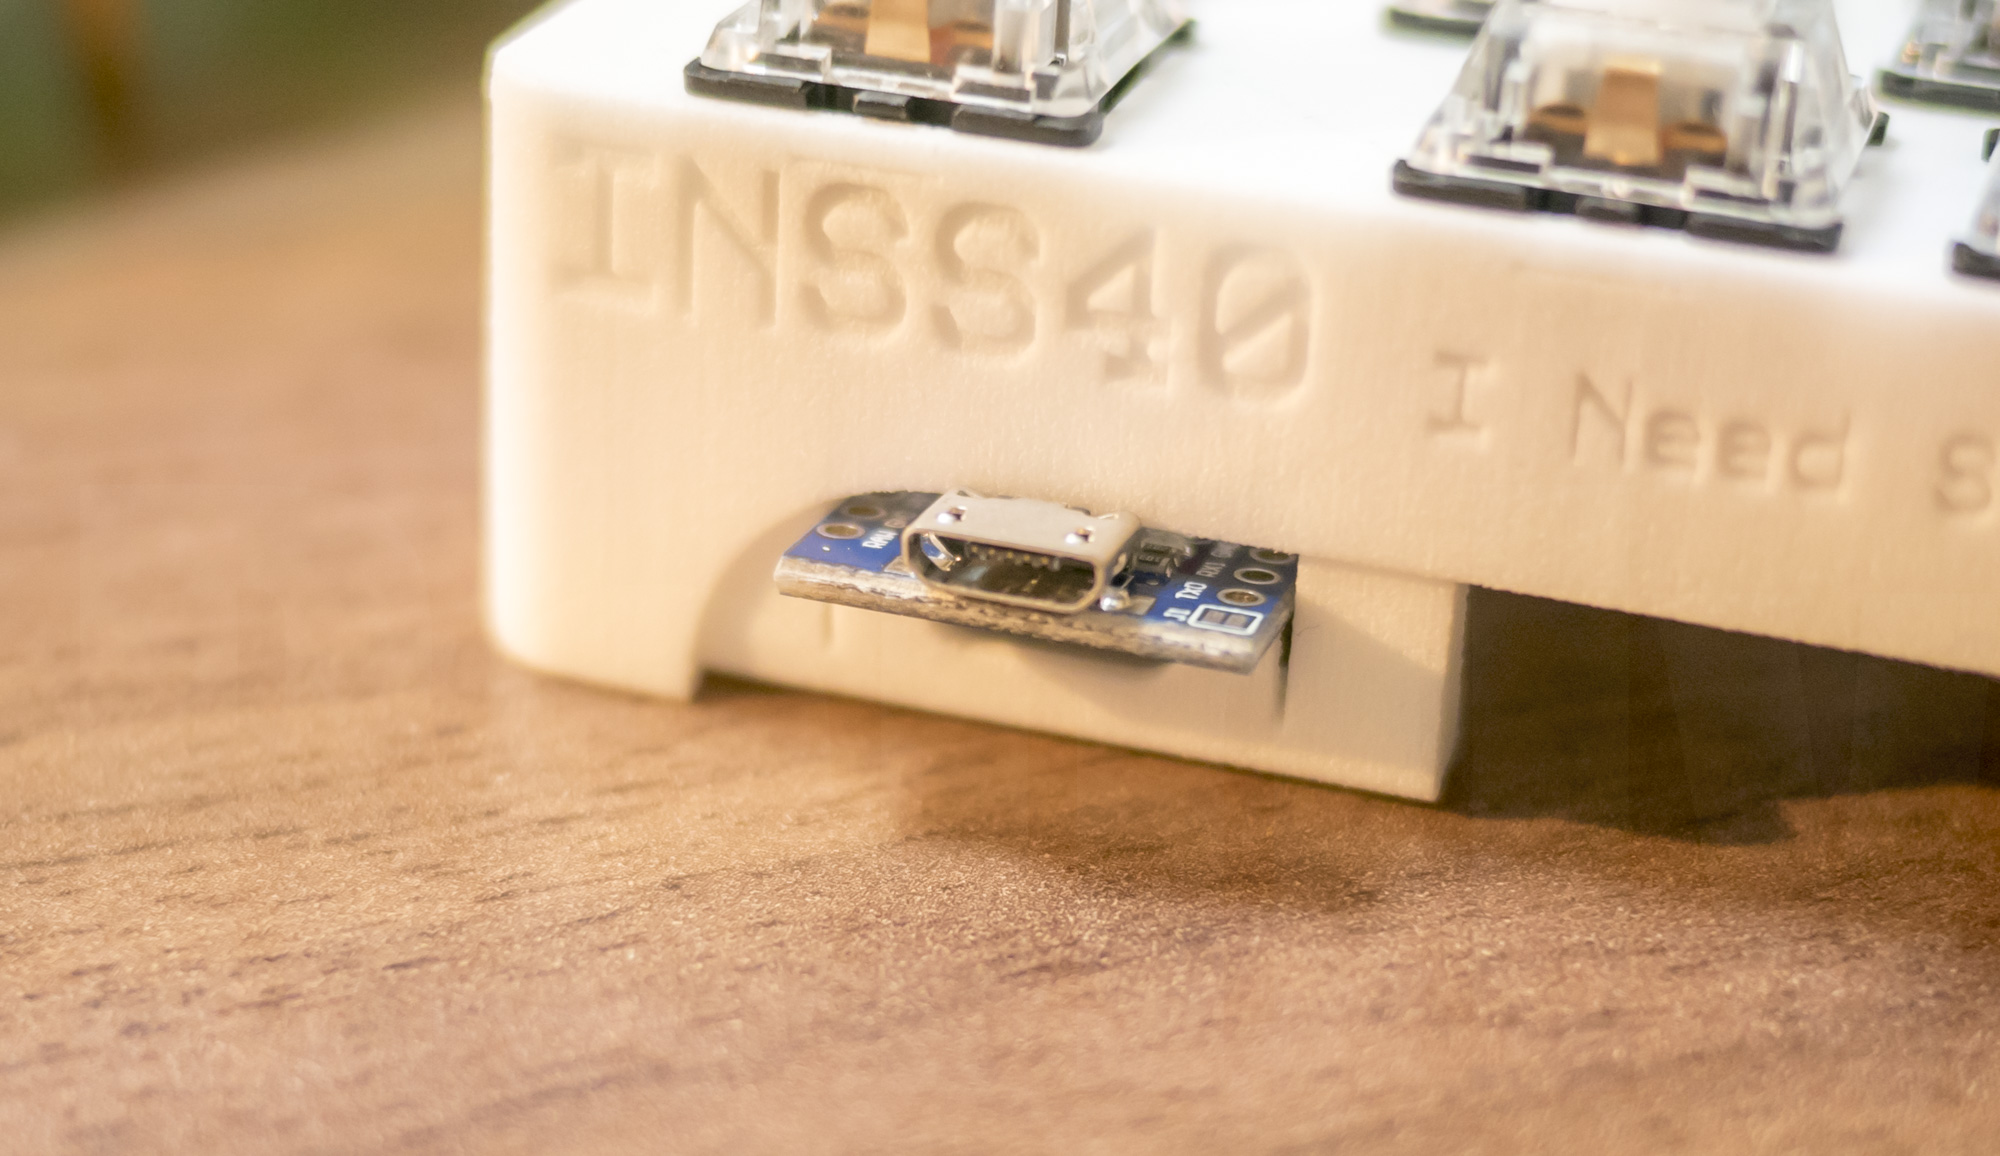
Pro Micro holder was a big challenge. I fail!!
I couldn’t insert Pro Micro because USB connector top hits the case. (ノ≧ڡ≦) Teehee~!
Everything fails at first time, right?

It turned out ok. Fortunately, after sanding a bit, Pro Micro through as I expected. I like nylon material because it is easy to rasp.
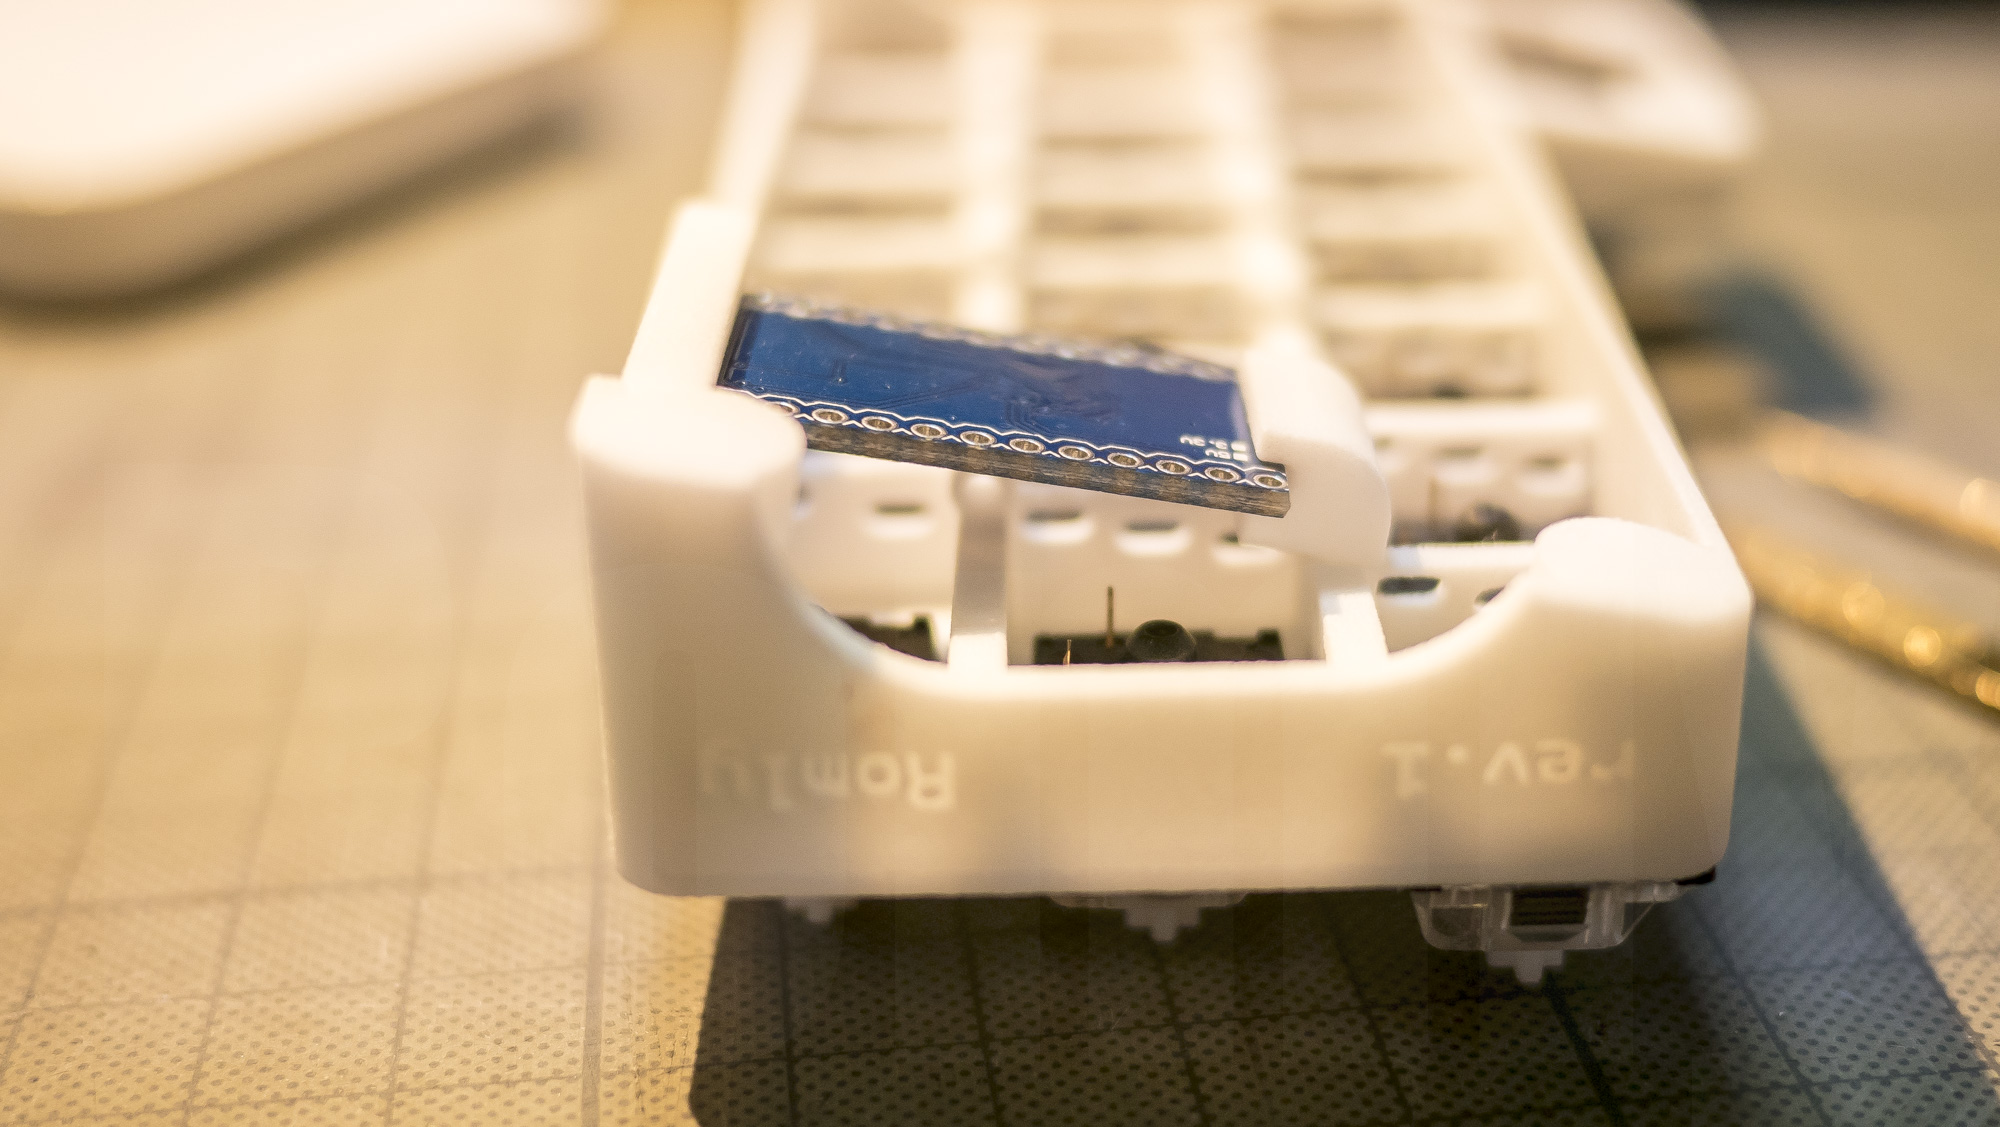
Double decker structure worked perfectly as I expected. But I think it would be better if I make it opposite. I mean put Pro Micro from the bottom instead of pass through backside hole. I am going to change it next time.
Another big challenge, plate-mount stabilizer hole. Totally no problem. So happy it went well at first time! Thanks to nylon, they keep enough strength to put stabilizers.
Usually stabilizers metal bar comes to front of the switch. But as you can see in INSS40, it has very low structure. So I put it backwards.
That’s all of 3D printed case of INSS40 keyboard. Thanks to read. Next I have to wire it using soldering iron. I’ve got diodes, so, I have to get en… enameled wire? I have to decide length… diameter?
Anyway I bought 0.4mm polyurethane wire (UEW). I have never done this kind of work. So nervous!
Here is my own keyboard INSS40 build log.
http://romly.com/archives/tag/build-my-own-keyboard
2件のフィードバック